Workaround to Amend an Accepted Declaration
Overview
Prior to Sequoia v5.7, there was no inbuilt support to amend an accepted declaration (i.e., any declaration that has an MRN allocated). The ability to send amendment messages to CDS has now been developed, and you should upgrade to the latest version of Sequoia.
If you are unable to amend your accepted declaration for some unforseen reason, the following procedure should be followed. (note, this must happen before the declaration has received the clearance notification - generally 10 minutes after acceptance). Post-clearance amendments should be addressed with HMRC directly.
Steps 2 and 3 below can be performed in either order - the critical point is that the original declaration would need to be cancelled before the clearance notification is received.
Step 1 - Copy the existing declaration
Click the Copy button on the toolbar of the accepted declaration and choose Copy Declaration from the drop-down options:

Step 2 - Submit the new, modified, declaration
The new declaration editor with all of the data copied from the original declaration will be displayed.
The Badge will need to be selected and Trader Reference [07] will also need to be set. Setting the badge will generate a new LRN - you may wish to make a note of this if you want to link the declaration to a job.
If the original declaration was inventory linked, the Z-MCR Previous Document [40] record will need to be added to the new declaration.
Amend the data as required and click the Send button.
Step 3 - Cancel the existing declaration
The original declaration will need to cancelled.
Click the Delete button on the toolbar.
This will display the Delete Declaration editor. Complete either the "Reason for deletion" text or input the MRN of the new, modified, declaration (the radio buttons toggle which option is available to complete).
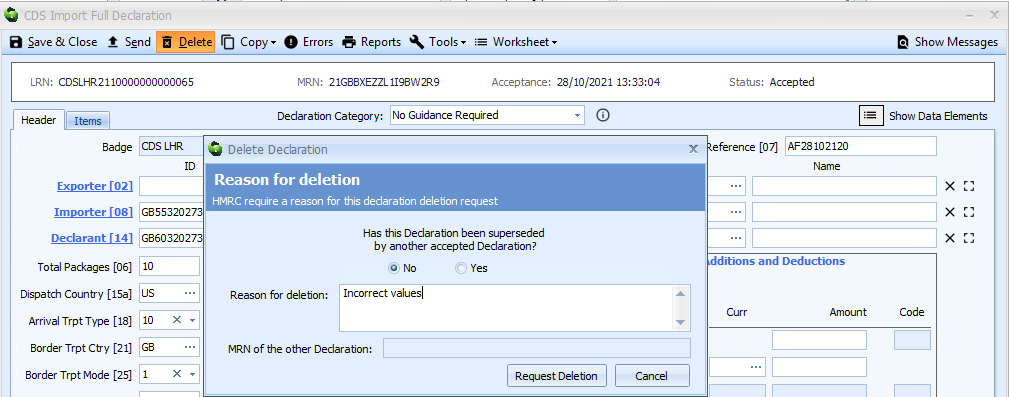
Click the Request Deletion button to send the cancellation request to CDS.
Assuming HMRC accept the cancellation request, the status will update to show the declaration has been cancelled:

Step 4 - Link the new declaration to the existing job
This step is optional.
If you want to link the replacement declaration to a job (probably the same job that has the original, now cancelled, declaration), open or create the job as required.
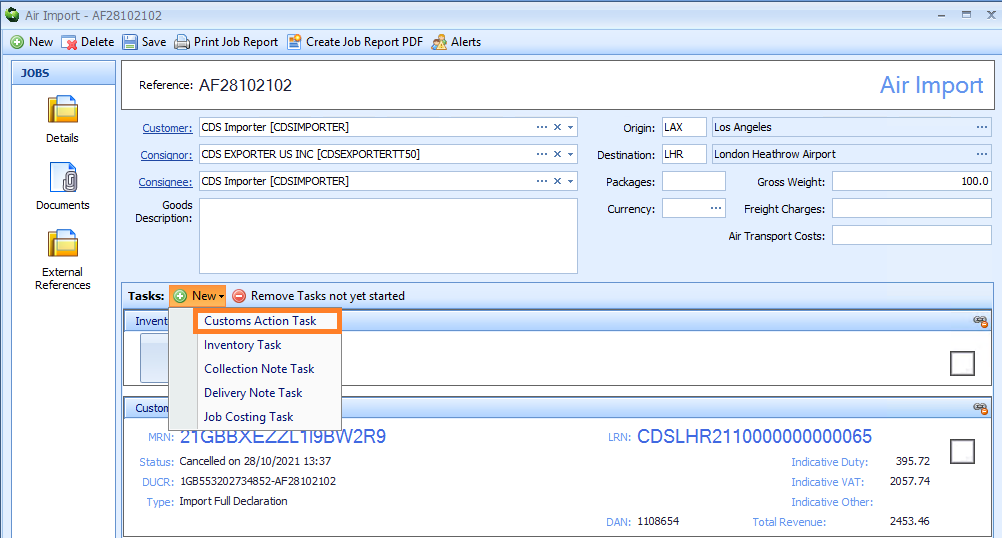
If you are opening an existing job, click the New button on the Tasks menu and select Customs Action:
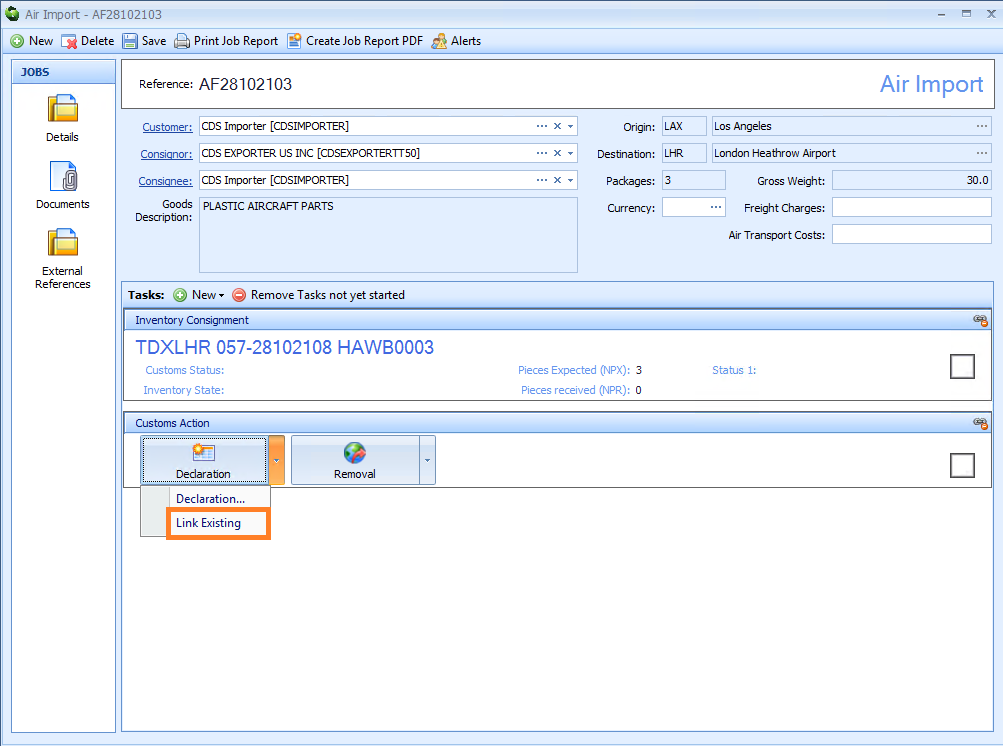
Click the drop-down adjacent to the Declaration button and select Link Existing as shown below:
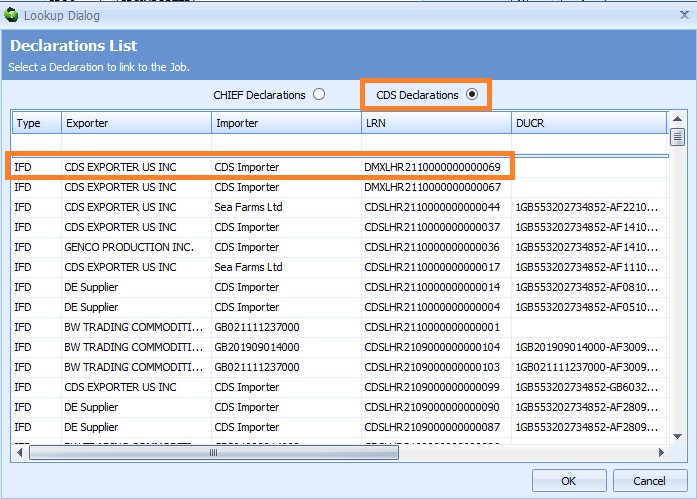
Select the CDS Declarations radio button and locate your live declaration in the list. You can use the filter row to search for the LRN of the declaration.
Click the OK button to close the dialog and link the declaration to the job.
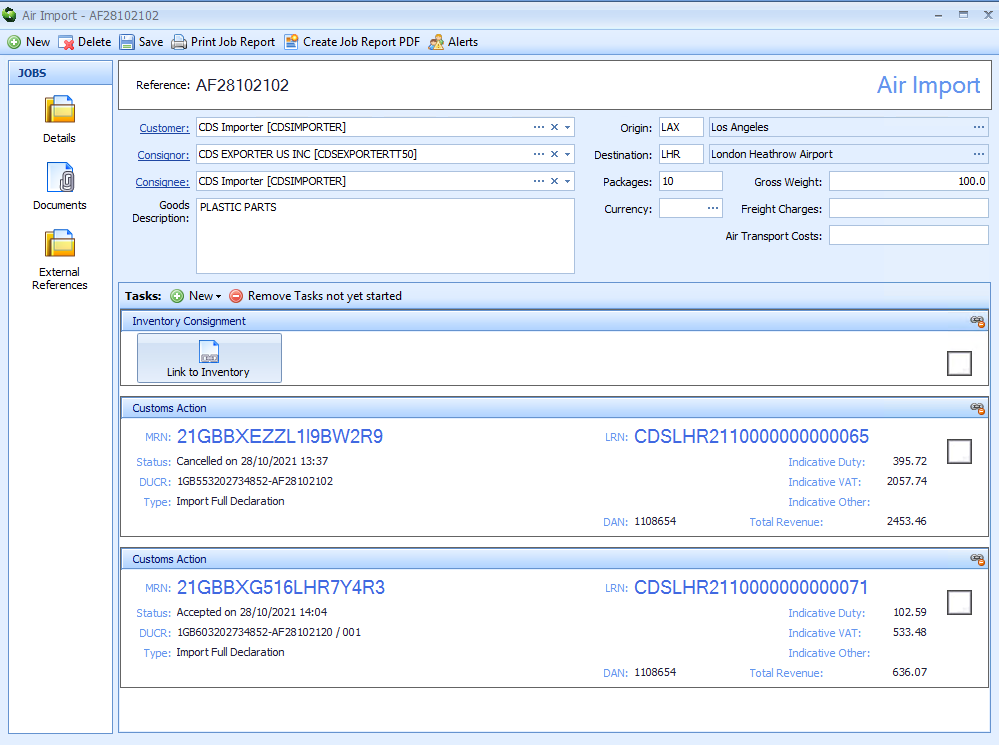
The job should then display details of both the cancelled and replacement declarations:
