Using Worksheets
Overview
This guide covers importing worksheets into a declaration. The worksheet data is used to 'build' the declaration items; any or all of the worksheet rows can be used and data can be "grouped" to create as few declaration items as possible.
An explanation of how worksheet rows are grouped can be found here.
It should be noted that any existing declaration items will be deleted when the worksheet is imported.
Multiple worksheets can be used to populate a single declaration. In addition, a single worksheet can be used multiple times for different declarations.
Details of the supported structure of the worksheet data can be found here.
A guide to importing the worksheet into Sequoia can be found here.
Importing Worksheets into a Declaration
The worksheet importing process begins from within an open declaration. This process is the same for both Import and Export declarations.
Selecting Worksheet(s) to Import
Click the Worksheet toolbar button at the top of the declaration editor and then click the Import Items from Worksheet option, as highlighted below.

A dialog will be displayed showing all the available worksheets. This list is filtered based on the type of declaration (imports or exports) and the Job Customer. If you have created a declaration without creating a Job then you will see all available import or export worksheets, regardless of the Customer.
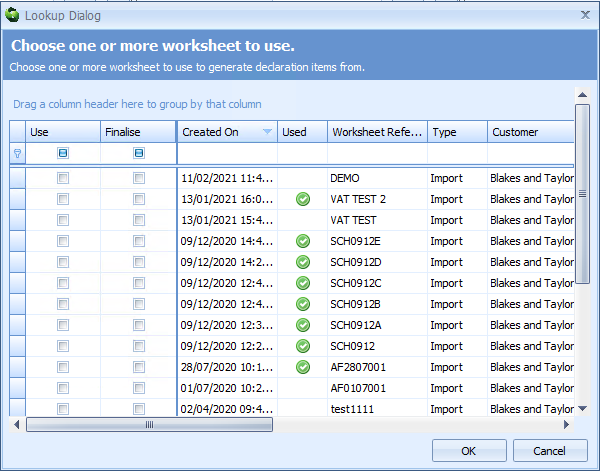
Tick the Use checkbox - in the first column on the list - for the worksheet(s) you wish to use.
The Finalise checkbox - in the second column - can be used to set the status of the worksheet(s) to [Finalised] once the declaration has been created. A [Finalised] worksheet cannot be re-used for subsequent declarations.
The Used column shows a green tick (as shown above) for every worksheet that has been wholly or partly used in previous declarations.
Once you have made your selection, click the OK button to display a dialog (shown below) where you can select the worksheet items.
Building the Declaration Items
This dialog lists all the rows from all of the worksheets you selected (as described above). It allows you to select the rows that will be used to 'build' the declaration items.
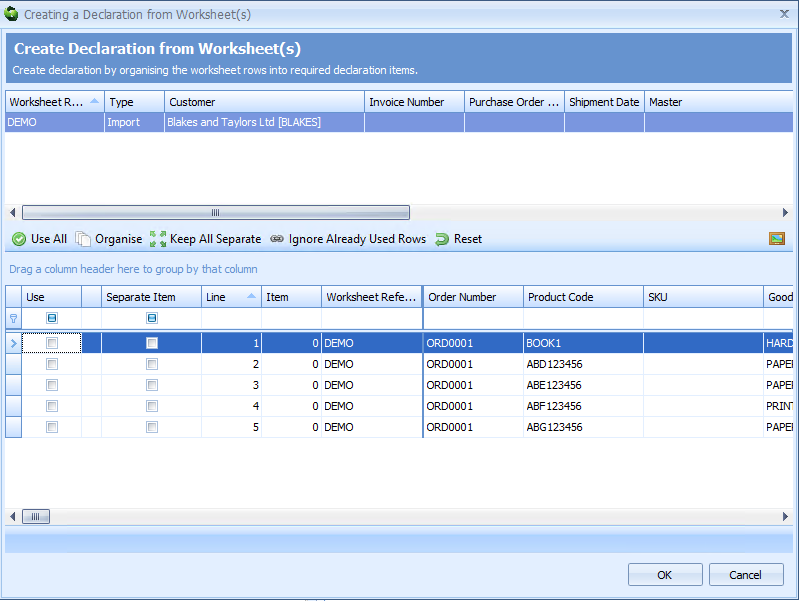
The top grid (list) displays details of the worksheets that you selected. The lower list displays all of the worksheet rows.
The buttons (on the toolbar above the list of rows) controlling the selection of the worksheet rows are described below.
| Button | Description |
|---|---|
| Use All | This will select all of the worksheet rows. Alternatively, you can tick the Use checkbox (first column) of each row on the list which you want to include. |
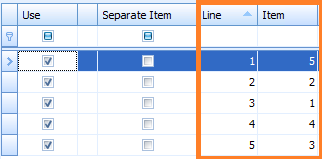
| Organise | This 'organises' the rows, based on your selections, ready for importing into the declaration. Once the rows have been organised, the list will show the declaration item number (fifth column - Item) for each of the selected rows. |
| Keep All Separate | By default, Sequoia will attempt to group worksheet rows together into as few declaration items as possible (where the data matches). See Grouping Worksheet Rows for information on how this is done. Clicking Keep all separate will instruct Sequoia to create a separate declaration item for each selected worksheet row, regardless of whether rows could be grouped together. Alternatively, you can tick the Separate Item checkbox (third column) of any individual rows that you wish to not be grouped together. |
| Ignore Already Used Rows | If any of the worksheet rows have been used previously, a "link" icon  will be displayed in the second column. will be displayed in the second column.This option prevents Sequoia from re-using worksheet rows that have been used previously when the Use All button is clicked. |
| Reset | De-selects any selected rows and/or any rows that have been checked to be kept separate. |
Individual rows can be selected by ticking the Use checkbox. In addition, individual rows can be forced to be kept separate from the 'grouping' process by ticking the Separate Item checkbox.
Once you have selected the worksheet rows that you want to use in your declaration, click the Organise button.
The number of declaration items that will be created will be displayed at the bottom of the worksheet row list:

The list will also display which worksheet rows (lines) correlate to which declaration items (as shown below).
Once you have reviewed these results and are happy for the declaration items to be created, click the [OK] button. A dialog will then display, asking you to confirm that you wish to continue.
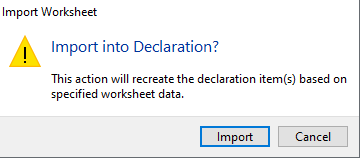
Click [Import]. The dialog will close and return you to the declaration editor which will refresh once all of the declaration items have been created.
Exceeding 99 Declaration Items
If the number of items to be created exceeds the maximum permissible for CHIEF (99) then Sequoia will prompt as follows:
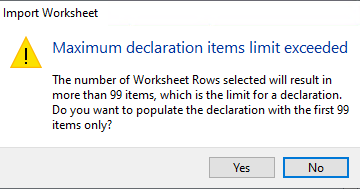
If you answer [Yes] to this question then the first 99 declaration items will be created, using only those worksheet rows that were organised into those 99 declaration items.
Any other rows will be ignored, even if you had selected them to be used.
These rows can be used on subsequent declarations by repeating the worksheet import process as described on this page.
Any "used" rows can be ignored by using the Ignore Already Used Rows button as described above. Using this technique, a worksheet can be easily reprocessed with just a few clicks to populate multiple declarations, without re-using the same worksheet row twice.
Grouping Worksheet Rows
By default, Sequoia will combine, or group, matching worksheet rows in order to create as few declaration items as possible.
This process can be overridden using the Keep Separate functionality described here.
The values of the following columns are used to determine if one row matches another and can therefore be combined.
Any monetary or weight values on the combined rows will be added together.
Import Worksheets
| Column | Description |
|---|---|
| E | Origin Country |
| G | Commodity Code |
| I | Preference |
| J | CPC (Customs Procedure Code) |
| L | Quota |
| N | Currency |
| Q | Valuation Method Code |
| S | Valuation Adjustment Code |
| T | Valuation Adjustment Percentage |
| V | Duty Type |
| W | Duty Rate |
| X | VAT Rate |
| AE | Consignor ID (EORI) |
| AF | Consignor Name |
| AK | Consignee ID (EORI) |
| AL | Consignee Name |
| BJ | Commodity Add Code |
The following columns are also used to group Import worksheet rows:
| Column | Description |
|---|---|
| CF | Duty MOP |
| CG | VAT MOP |
Export Worksheets
| Column | Description |
|---|---|
| E | Destination Country |
| F | Dispatch Country |
| G | Origin Country |
| I | Commodity Code |
| K | CPC (Customs Procedure Code) |
| N | Currency |
| R | UN Dangerous Goods Code |
| Y | Consignor ID (EORI) |
| Z | Consignor Name |
| AE | Consignee ID (EORI) |
| AF | Consignee Name |
| BD | Commodity Add Code |
