CRM - Automatic Customer Reports via Email
Overview
Declaration reports are created at various stages of the declaration process, for example, when a declaration is accepted by customs, when goods are permitted to progress or when goods are released etc. You can set up Sequoia to automatically email these declaration reports to your customers when they are created.
The reports will be sent as attachments to an email and the body of the email will contain key relevant information related to the consignment such as the DUCR, Job reference or any external references, etc. An example email is shown below.
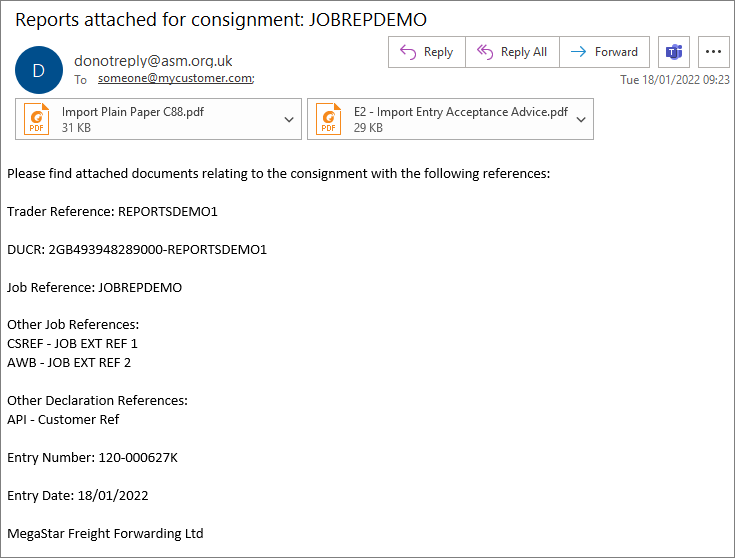
These reports are set up within the CRM section of Sequoia.
Email Server Configuration
The Sequoia server must be configured with your SMTP server details, a sender email address and, if required, a signature block for the emails. Please refer to the Email Configuration guide to setup your email server (SMTP) details.
CRM Email Configuration
Details of your sender email address and any email signature text will need to be configured on the Sequoia server to allow Sequoia to send the emails.
Open the Sequoia Configuration application
Open the Sequoia Configuration application by double clicking on the Sequoia Configuration icon on the Sequoia server.

The Sequoia Management Console will appear.
Enterprise Configuration
Click on the small arrow next to Sequoia Enterprise Management on the left hand side of the Sequoia Management Console.
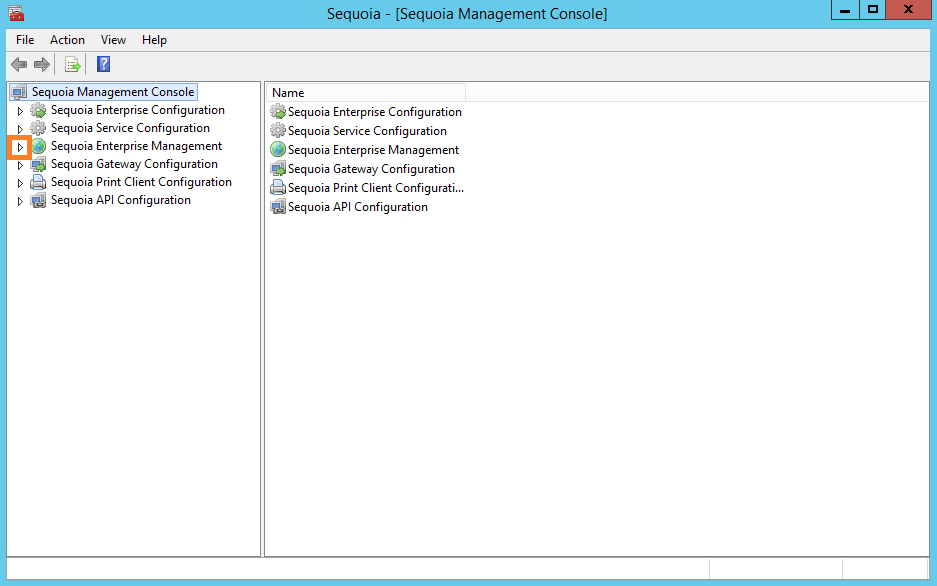
Click on your enterprise name under Sequoia Enterprise Management. In the example below, the enterprise name is 'MegaStar Freight Forwarding Ltd'. You should click on the small arrow to the left of your own enterprise name.
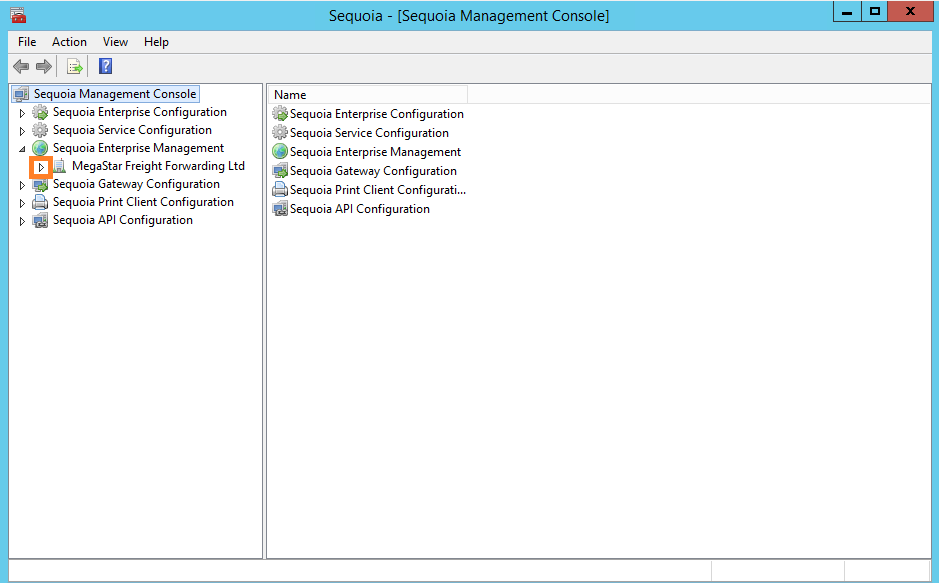
Next, click on the small arrow on the left hand side of Configuration.
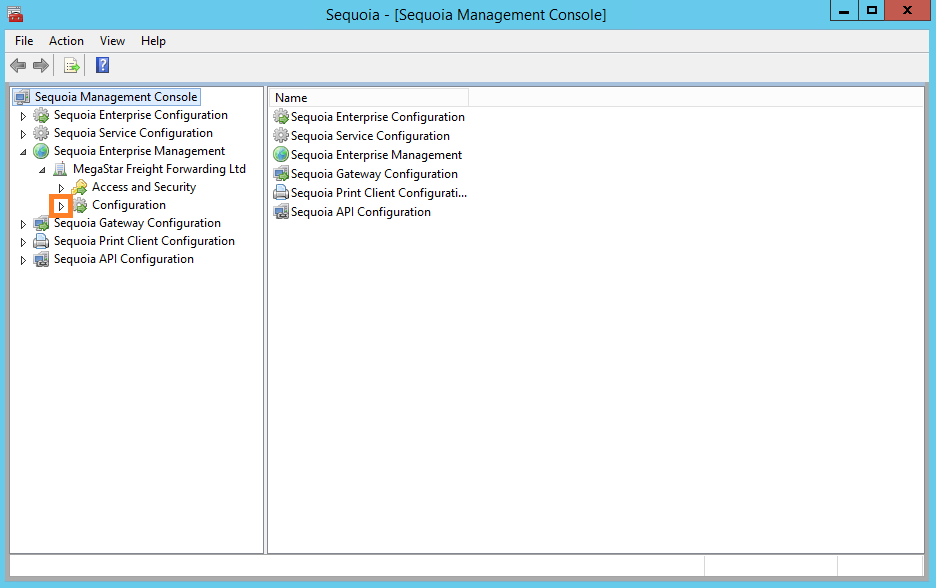
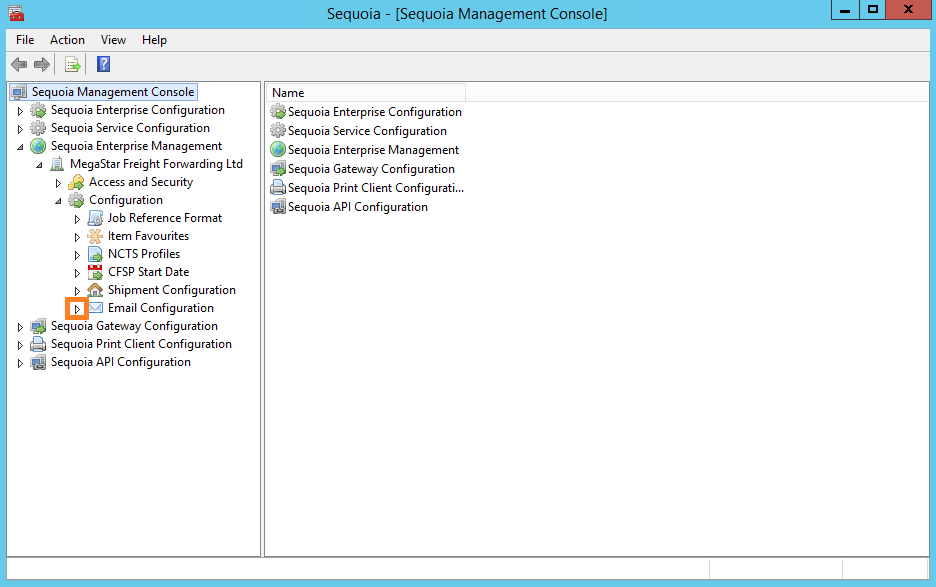
Next, click on the small arrow on the left hand side of Email Configuration.
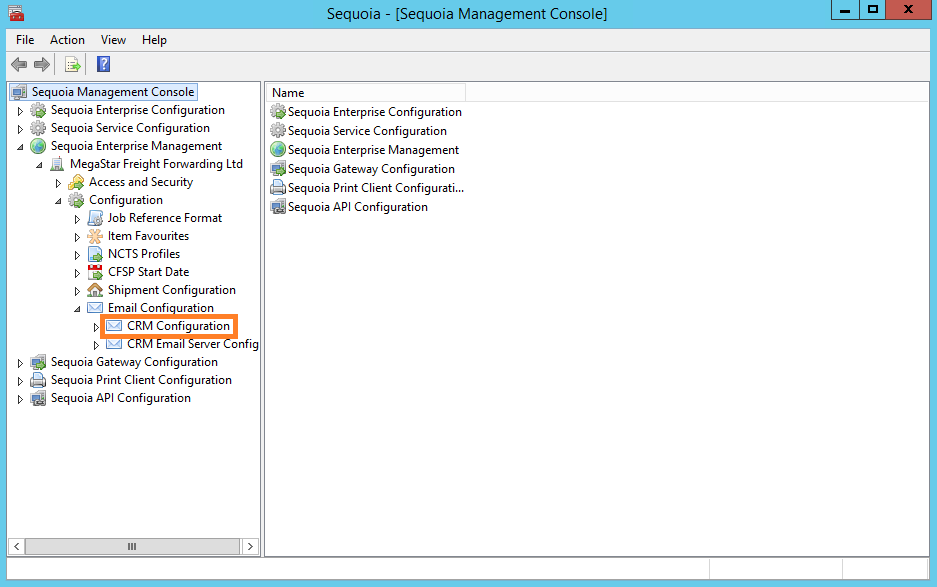
Next, click on CRM Configuration.
The CRM Configuration editor will appear to the right of the tabs.
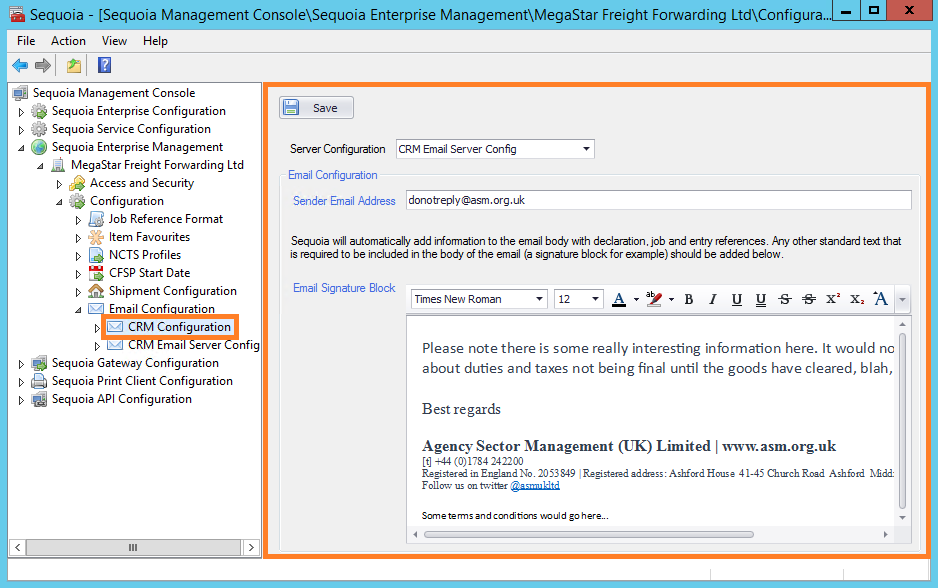
Enter the information described in the table below into the boxes of the CRM Configuration tab.
| Box | Information required |
|---|---|
| Server Configuration | (Required). Select the name of the server configuration. |
| EMAIL CONFIGURATION | |
| Sender Email Address | (Required). The email address to use as the sender of the emails. |
| Email Signature Block | Any text which should be included in every email sent. This could be something like a signature block. |
Once the information has been entered, click Save at the top of the page.
CRM Configuration
Each CRM account can be configured to receive the required reports. The reports will be emailed when the CRM account is used:
- As the Customer of a job the declaration is linked with
- As the Consignee [08] of an import declaration
- As the Consignor [02] of an export declaration
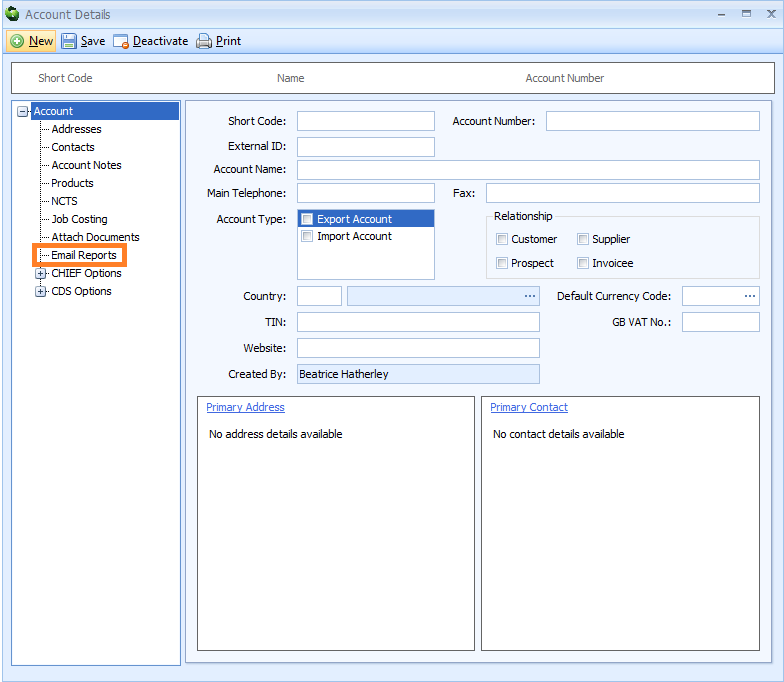
Open the required CRM account and navigate to the Email Reports node as shown below:

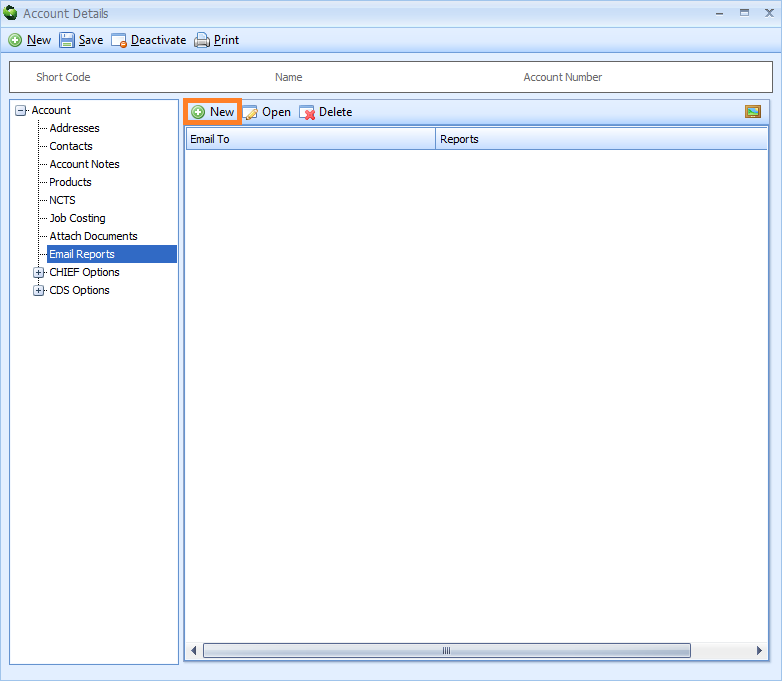
The grid on the right hand side will display any previously configured reports. Use the Open button or double click a record in the list to view and make any necessary changes.
To configure a new customer report, click the New button on the toolbar.
This will open a dialog where you can configure the recipient email address(es), select the required reports and specify a subject line.
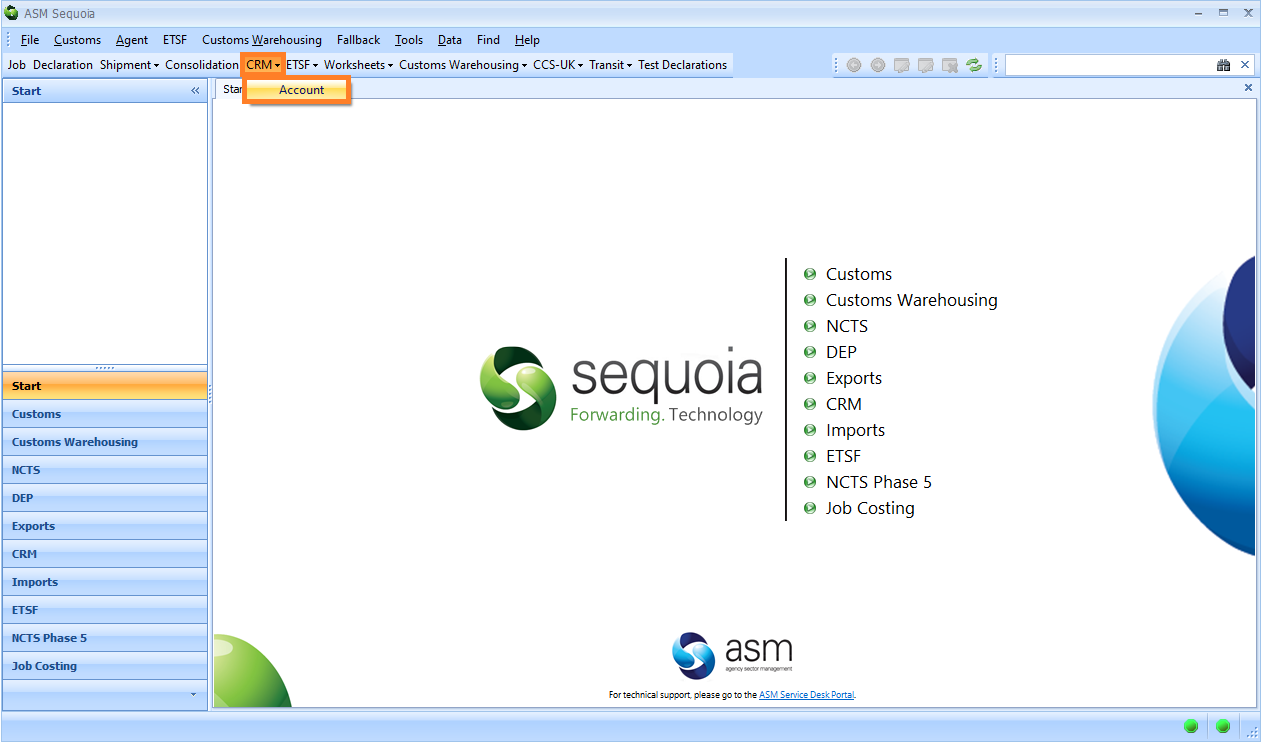
Click on CRM followed by Account on the drop-down menu.
An Accounts Details editor will appear. Click on the Email Reports node.
The Email Reports list will appear on the side. Click on New.
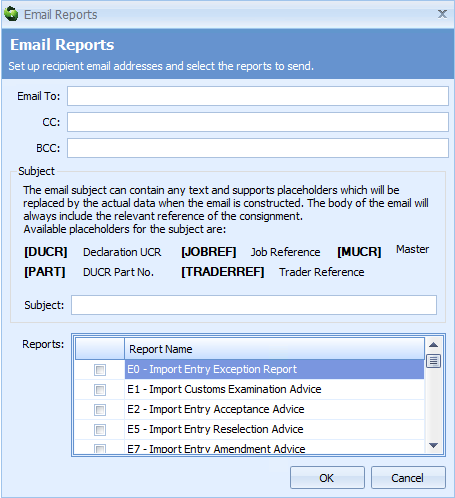
An Email Reports editor will appear.
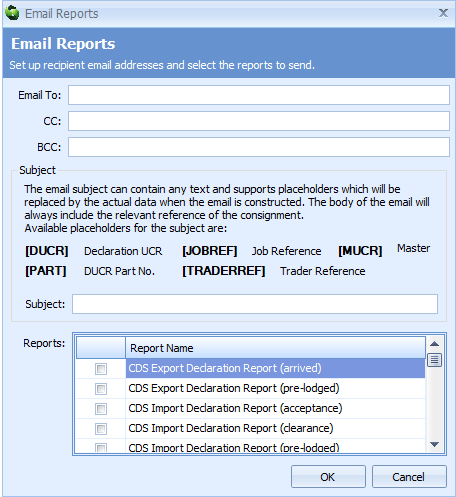
| Box | Information required |
|---|---|
| Email To | REQUIRED. The email address(es) that the report(s) will be sent to. If there is more than one email address, separate each one with a semi-colon (;) |
| CC | If you would like to copy people into this email, enter the CC email address(es) that the report(s) will be sent to. If there is more than one email address, separate each one with a semi-colon (;) |
| BCC | If you would like to blind copy people into this email, enter the BCC email address(es) that the report(s) will be sent to. If there is more than one email address, separate each one with a semi-colon (;) |
| Subject | OPTIONAL. The email subject text. If this box is left blank, 'Copy Documentation For Consignment: [DUCR]' will be automatically entered into the email subject. The email subject can contain text and 'placeholders'. 'Placeholders' are words that will be replaced with data when the email is created. Available placeholders are: - [DUCR] - this will be replaced by the Declaration UCR - [JOBREF] - this will be replaced by the Job Reference - [MUCR] - this will be replaced by the Master UCR - [PART] - this will be replaced by the DUCR Part Number - [TRADERREF] - this will be replaced by the Trader Reference from box 07 of the declaration For example, if the email subject is set as 'Reports attached for consignment: [JOBREF]', then an email would be sent with the subject: 'Reports attached for consignment: AI-22010001' for declaration reports associated with Job Reference "AI-22010001". The main body of the email will always include the relevant consignment reference |
| Reports | REQUIRED. Tick the boxes next to the reports that you wish to send to the above email addresses Please note that if you choose both the C88 and E2 reports for import declarations, then the email will only be generated once BOTH reports have been produced. Likewise, if you choose both the ESS and X2 reports for export declarations, then the email will only be generated once BOTH reports have been produced |
Click the OK button. This will close the dialog and add a new row to the grid. Click the Save button at the top of the CRM account editor to save the changes.
For flexibility, you can add multiple report configurations to each CRM account. In this way you can setup a customer so that import documents go to one particular recipient in their company and export declaration documents go to another.
