Customs Warehousing - Removals
Import removals from other systems (SDF only)
Sequoia can upload removal details from warehouse management systems to enable quicker removal processing. Currently this can only be done via SDF (fixed length text) files. The data in these files must be structured correctly. The details of the file structure can be seen here.
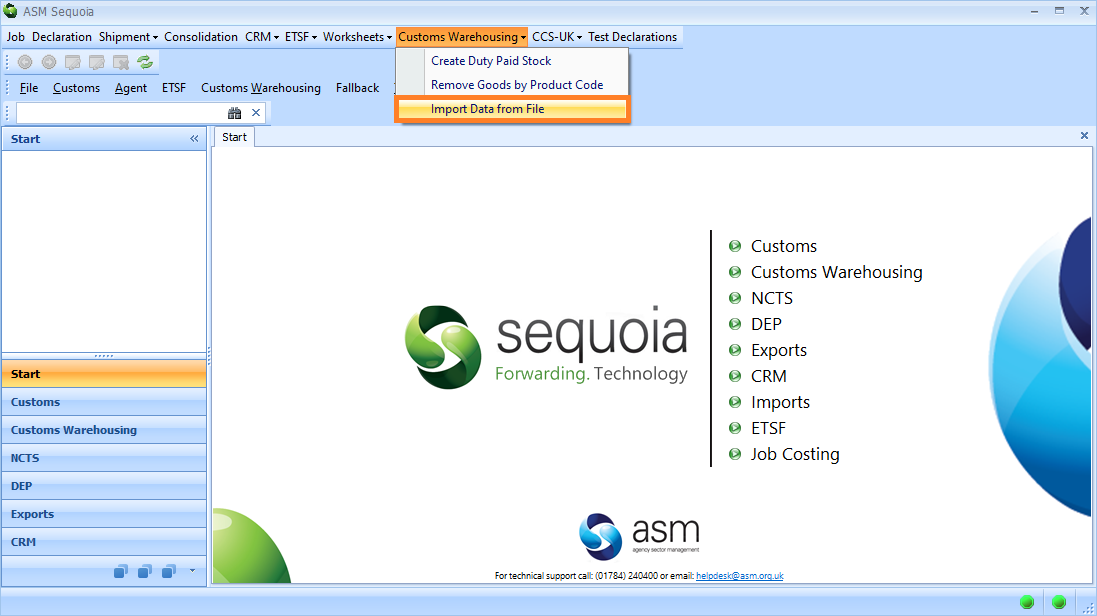
To import removal information from an SDF file, click on Customs Warehousing on the main Sequoia toolbar and select Import Data from File from the drop down menu that appears.
An Import Removal Data editor will appear.
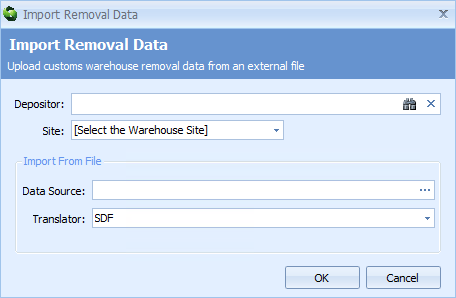
| Box | Information |
|---|---|
| Depositor | Enter the name, Short Code, or EORI/ TIN number into this box of the depositor or importer in this box Type this information into this box or select it from a list by either typing a ? into this box or by clicking on the ellipsis (the 3 dots) to the right of this box to display the Account Lookup Dialog box. Next, enter the code or part of the code into the search box, click on the binoculars icon to search for it and then select it from the resulting list by double clicking on it |
| Site | The warehouse site where the goods are located You can select this information from a list by clicking on the |
| Data Source | Click on the ellipsis (the three dots) to the right of this box. A pop up box will appear allowing you to search your network drives and locate your SDF file. Once you have found it, double click on it to select it |
| Translator | This box will automatically display 'SDF' |
Next, click on the OK button to import the SDF file.
A Removal Data File editor will now appear showing all your uploaded data files. The data file information can be manually edited in the editor if necessary. Click on the Save & Close button at the top right hand side of the editor to save the data files and close the editor. Multiple files can be uploaded as necessary by repeating the steps above.
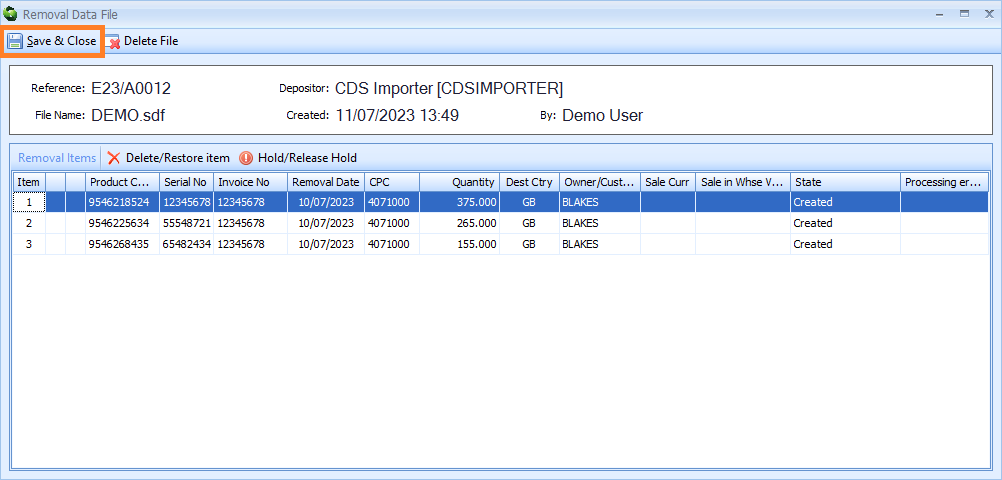
This uploaded removal data will be stored in Sequoia, however, none of the removals contained in the file have been processed at this stage. No stock items have the removal recorded against them adjusted to decrement the remaining stock.
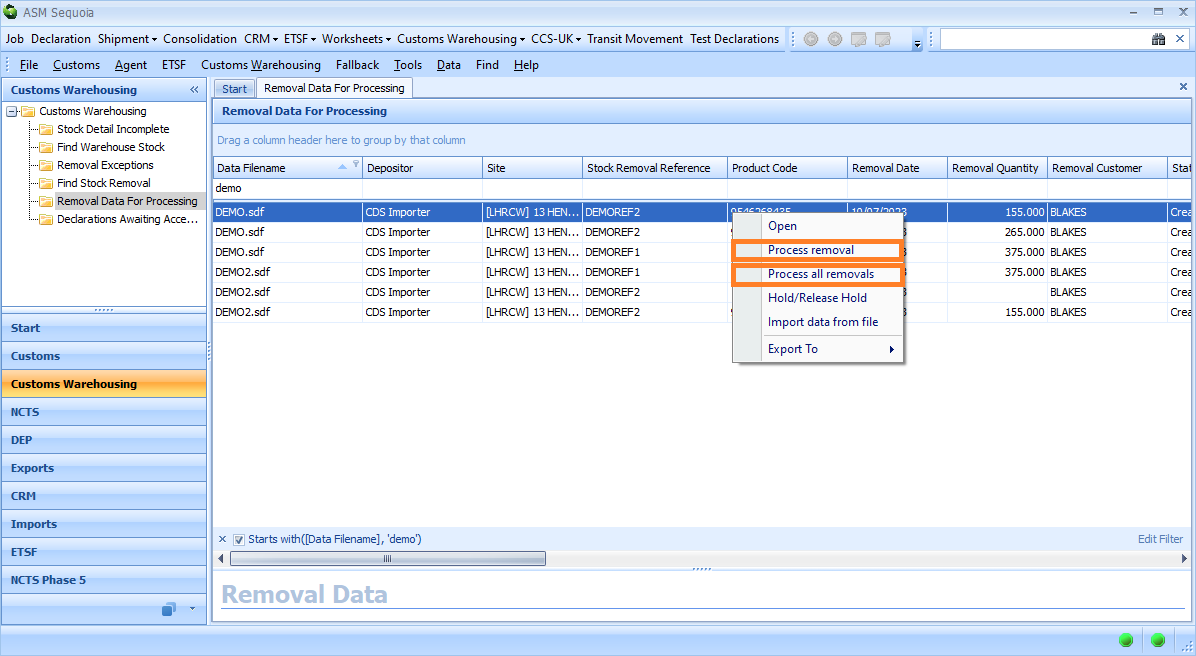
In order to process the data in the files(s) and create the stock removals, right-click on the stock item in the Removal Data For Processing list and choose either Process removal to create stock removals from the selected data file(s), or Process all removals to create stock removals from all of the data files shown in the list.
Managing the uploaded removal data
Removals can be temporarily put on hold or deleted to prevent them from being processed automatically. You can also process your removals which means that information from the uploaded files will generate removal records in Sequoia based on the data on file.
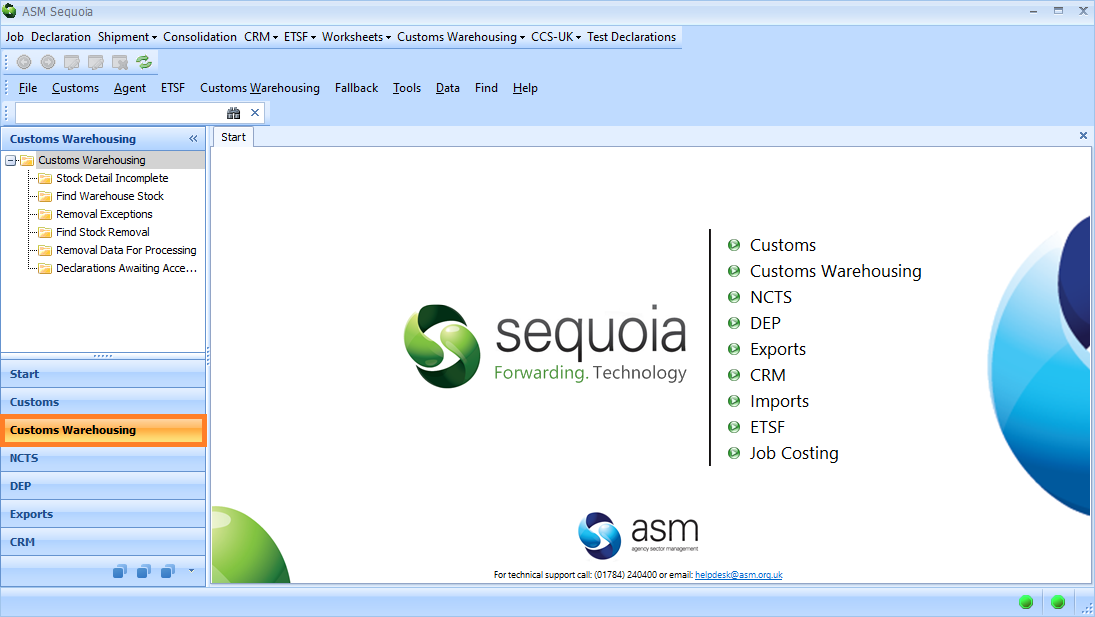
First locate the item file you wish to put on hold or delete by clicking on the Customs Warehousing module at the bottom left hand side of the screen.
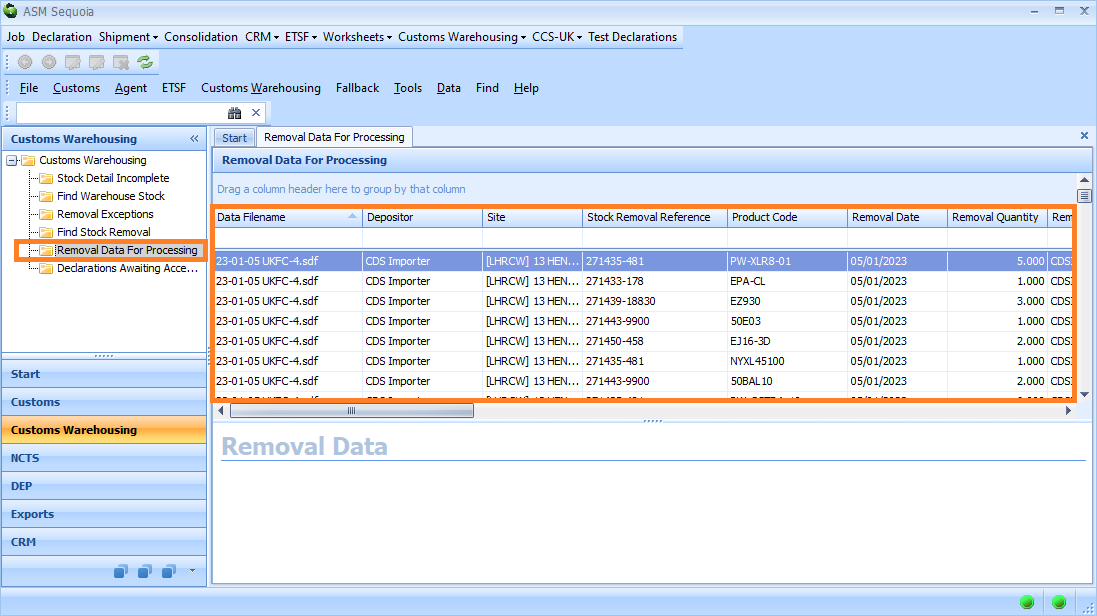
Then, click on the Removals Data for Processing folder at the top left hand side of the screen. The uploaded data will display in the Removal Data for Processing results list.
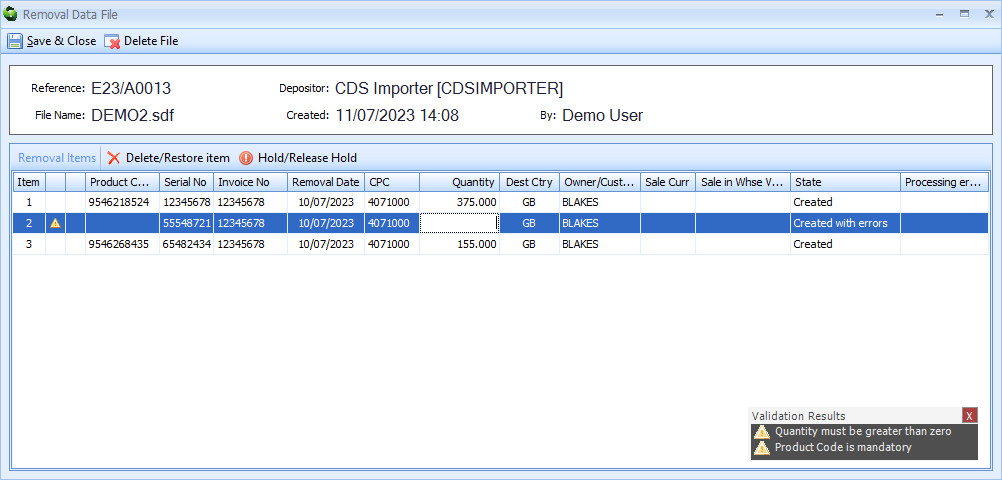
Double click on a record on the Removal Data for Processing list to display the file details in the Removal Data File editor.
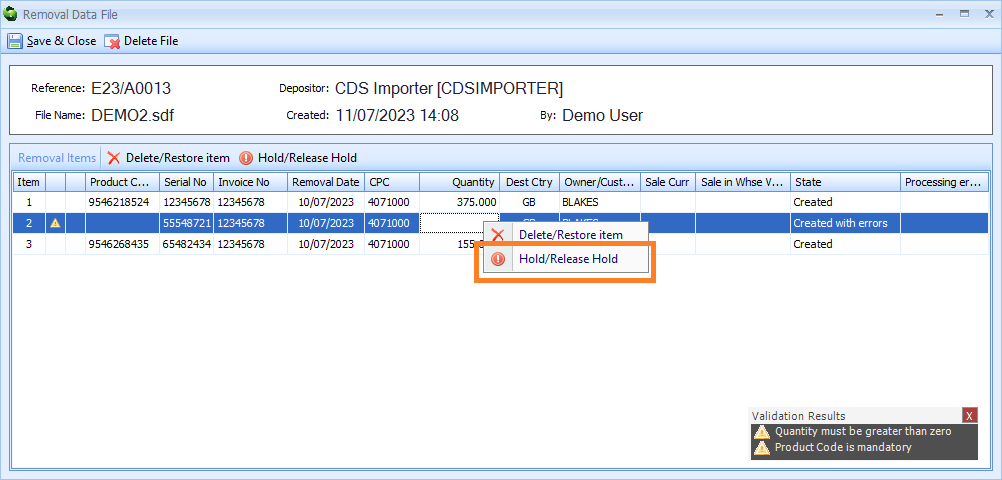
To put an item on hold, right click on the file and select Hold/Release Hold from the drop down menu. A red icon will appear in the 'On Hold' column of the item in the list. To take the item off hold, repeat this action.
To delete a removal item, which will prevent it from being removed, highlight the removal item and select Delete/Restore item and confirm the deletion.
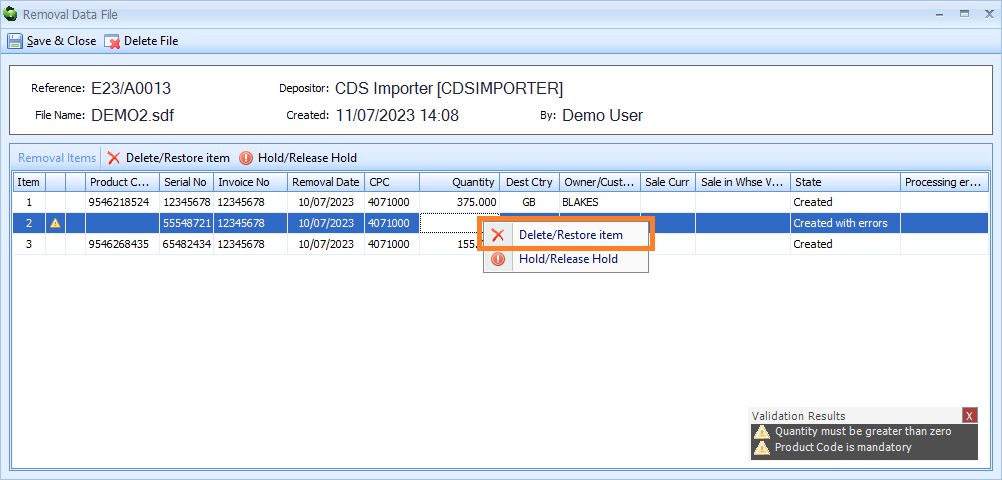
The State column of the item in the Removal Data for Processing list will display as 'Deleted'. If all other items are processed this item will be removed from the list.
Delete entire SDF upload
To delete an entire uploaded file, double click on the corresponding line or lines in the Removal Data File. Next, click on the Delete File button at the top left hand side of the editor.
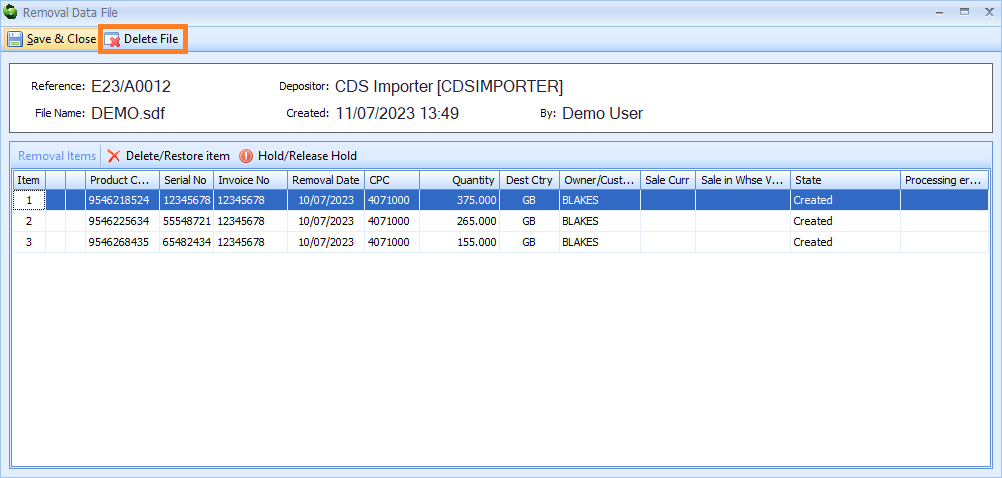
A pop up box will appear and you can confirm the deletion by clicking on Delete. The line or lines will then be removed from the folder.
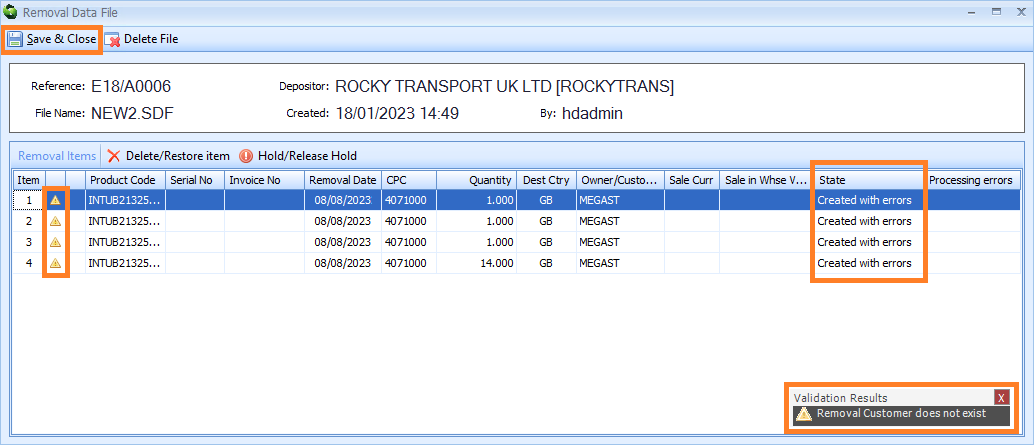
SDF Imports 'Created with Errors'
A file or files in the Removal Data File editor may show as 'Created with Errors' in the State column. Each row with errors will also display a yellow triangle with an exclamation mark inside it. The 'Validation Results' in the bottom right corner will highlight the cause(s) of the errors. You can double click on the file to open and review it and resolve any issues.
You can make any amendments in CRM or in the file data required and then click Save & Close. You can then continue with any removal processing.
