Custom Warehousing - Configuring Authorisation & Roles
Configuration means selecting overall options that will make Sequoia function in ways specific to your organisation.
Configure Authorisation
Customs will have given you an authorisation for you to operate the customs warehousing procedure. Here you can configure your authorisation in Sequoia.
Open the Sequoia Configuration application on the Sequoia server.

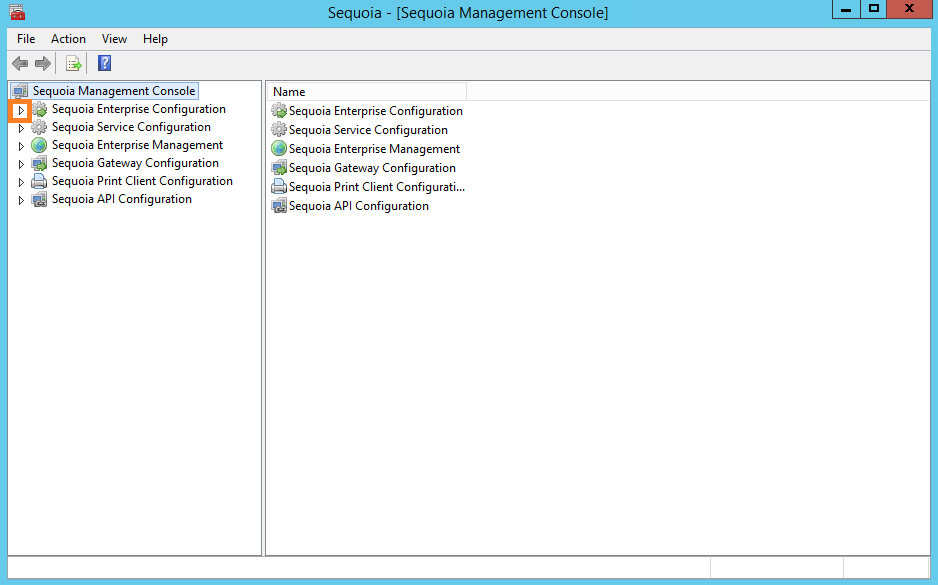
The Sequoia Management Console will appear. Click on the small arrow next to Sequoia Enterprise Configuration on the left hand side of the screen.
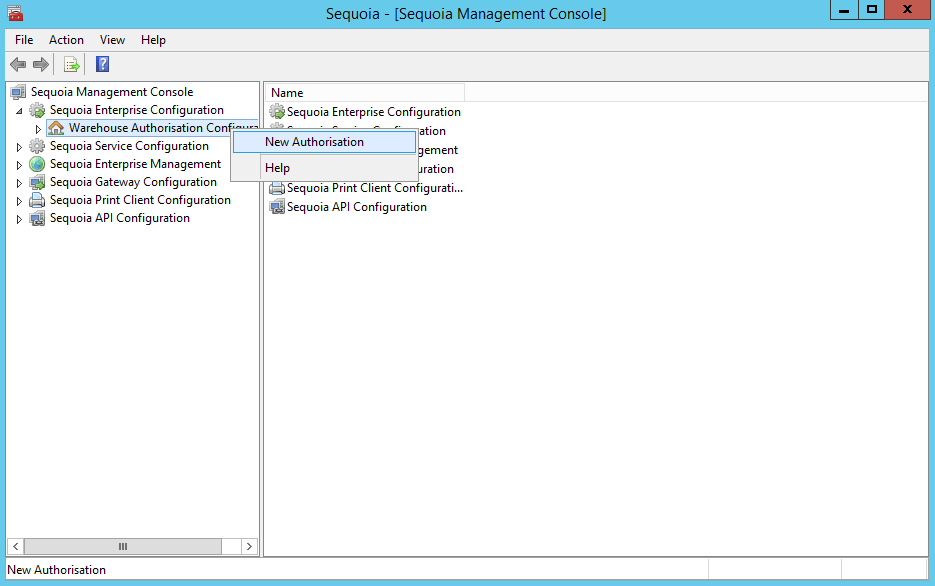
Right click on Warehouse Authorisation Configuration and click on New Authorisation in the drop down menu that appears.
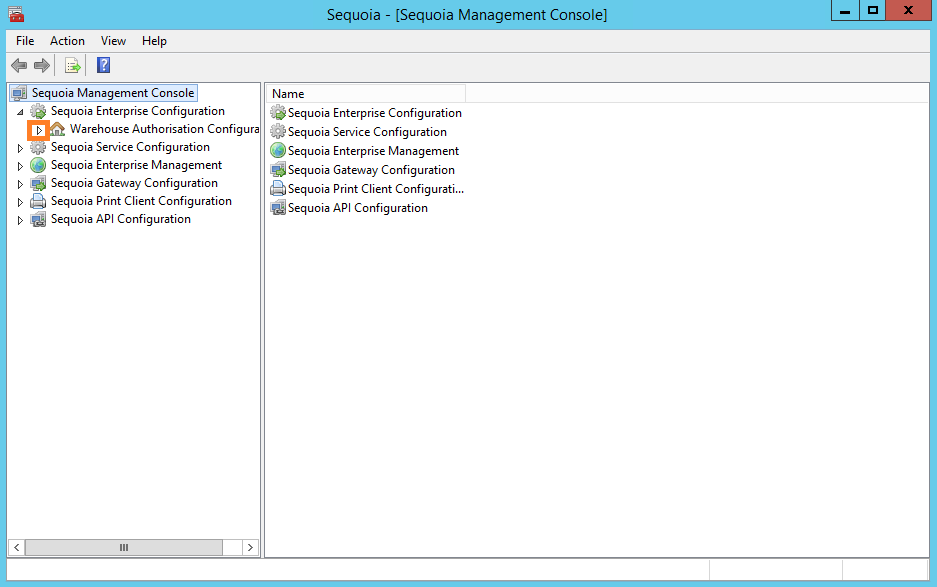
Next, click on the small arrow next to Warehouse Authorisation Configuration to expand the menu.
You will now be able to see the newly created authorisation. Click on New Authorisation.
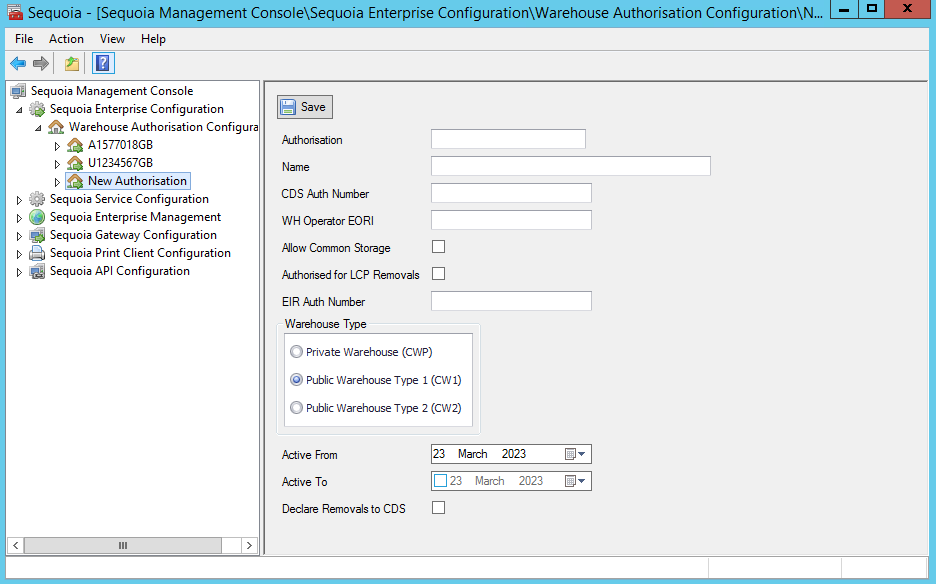
Enter the information described in the table below into the boxes of the New Authorisation form on the right hand side of the screen.
| Box | Information |
|---|---|
| Authorisation | Enter the warehouse authorisation number as notified by HMRC. This should include the warehouse type, reference number and country code (for example, R1234567GB) |
| Name | Enter a name of your choice for this warehouse. This name will appear on lists and reports going forward (for example on stock lists and reports) |
| CDS Auth Number | Enter the CDS authorisation reference number. This will be the long authorisation number issued by HMRC. It should start with 'GBCW' and followed by 'P', '1' or '2' depending on your warehouse type. This authorisation number is declared as the reference to a C517, C518 or C519 document and is automatically added to 'out of warehouse' declarations |
| WH Operator EORI | The warehouse operator EORI number. This should be the EORI number of the party that owns the warehouse. This EORI will then be automatically set as the CWP (Private Warehouse), CW1 (Public Warehouse Type 1) or CW2 (Public Warehouse Type 2) Authorisation Holder for 'out of warehouse' declarations. A Private Warehouse (CWP) is operated by a business whose purpose is to store other people's goods. They are the warehousekeeper and you are the depositor. A Public Warehouse Type 1 (CW1) is used when the responsibilities lie with the holder of the authorisation and with the holder of the procedure. A Public Warehouse Type 2 (CW2) is used when the responsibilities lie with the holder of the procedure |
| Allow Common Storage | Tick this box if your authorisation allows duty paid stock to be stored in the warehouse |
| Authorised for LCP Removals | Tick this box if you are authorised to remove goods from this warehouse using LCP (now EIDR - Entry In Declarant's Records). If you tick this box, an IMZ supplementary declaration will be generated when there is a removal from the warehouse. If you do not tick this box, then an IMA full, standard declaration will be generated when there is a removal from the warehouse |
| EIR Auth Number | Enter the authorisation number if you are authorised for LCP / EIDR. This authorisation number is declared as the C514 document reference |
| Warehouse Type | Select the type of warehouse. A Private Warehouse (CWP) is operated by a business whose purpose is to store other people's goods. They are the warehousekeeper and you are the depositor. A Public Warehouse Type 1 (CW1) is used when the responsibilities lie with the holder of the authorisation and with the holder of the procedure. A Public Warehouse Type 2 (CW2) is used when the responsibilities lie with the holder of the procedure |
| Active From | Specify the date from which this warehouse authorisation is active |
| Active To | If this warehouse authorisation is no longer active, but goods are still in the warehouse and covered by the authorisation, then specify the last date that it was active. This will allow you to remove goods from the warehouse but prevent you from making any more declarations into warehouse using this authorisation |
| Declare Removals to CDS | You must put a tick in this box to ensure that out of warehouse declarations are declared to CDS |
Click on the Save button at the top left of the form. If you wish to add additional Authorisations, repeat the process above.
Configure Sites (Locations)
Your warehouse authorisation will cover one or more physical warehouse locations. These are called 'Sites' in Sequoia and will need to be configured.
Configure the warehouse locations of your authorisation in Sequoia by following the instructions below.
Right click on the Authorisation that you created in the step above and click on New Site.
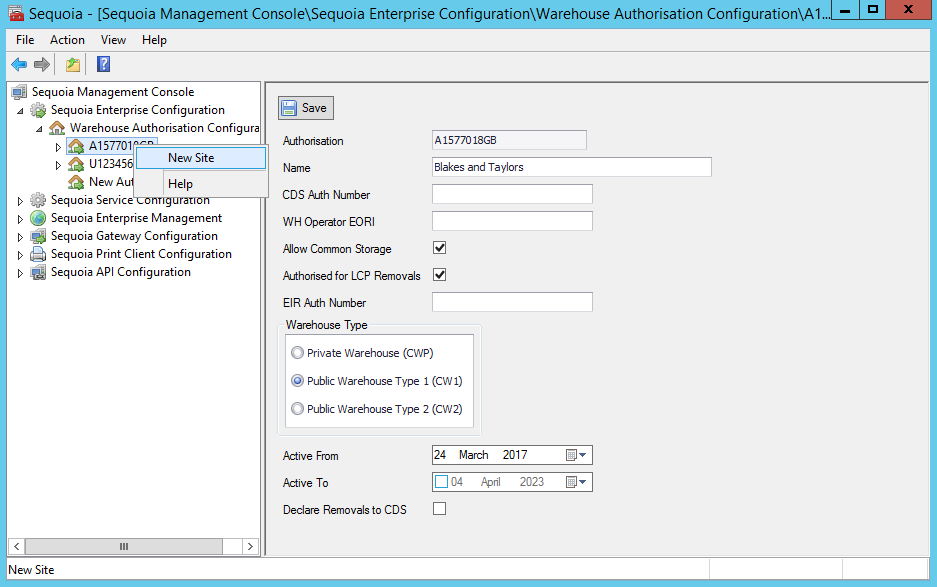
Click on the New Site created. A Site Details form will appear on the right hand side of the screen.
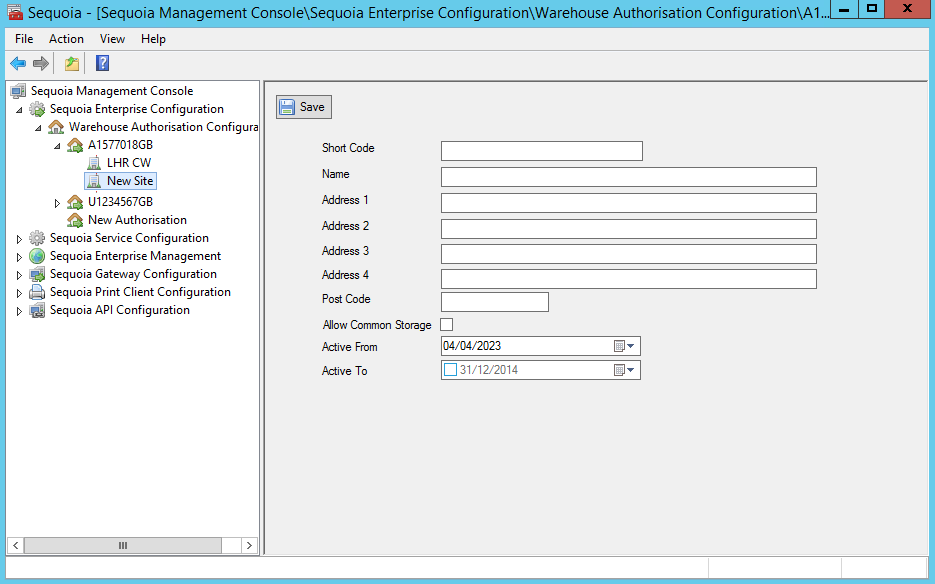
Next, enter the information described in the table below into the boxes of the Site Details form.
| Box | Information |
|---|---|
| Shortcode | Enter the shortcode for this warehouse location. This will appear on lists (of stock etc) and reports going forward |
| Name | Enter a name for this warehouse location |
| Address Lines | Enter the address of this warehouse location |
| Allow Common Storage | Tick this box if your authorisation allows duty paid stock to be stored in the warehouse location |
| Active From | Specify the date from which this warehouse location is active |
| Active To | If this site is no longer in use, enter the date that it was no longer in use from |
Click on the Save button at the top left of the form. If you wish to add additional Sites, repeat the process above.
Create Security Role for Users
To give users access to the Customs Warehousing module, you will need to set them up with a Customs Warehousing Security Role.
To do this, open the Sequoia Configuration application on the Sequoia Server.

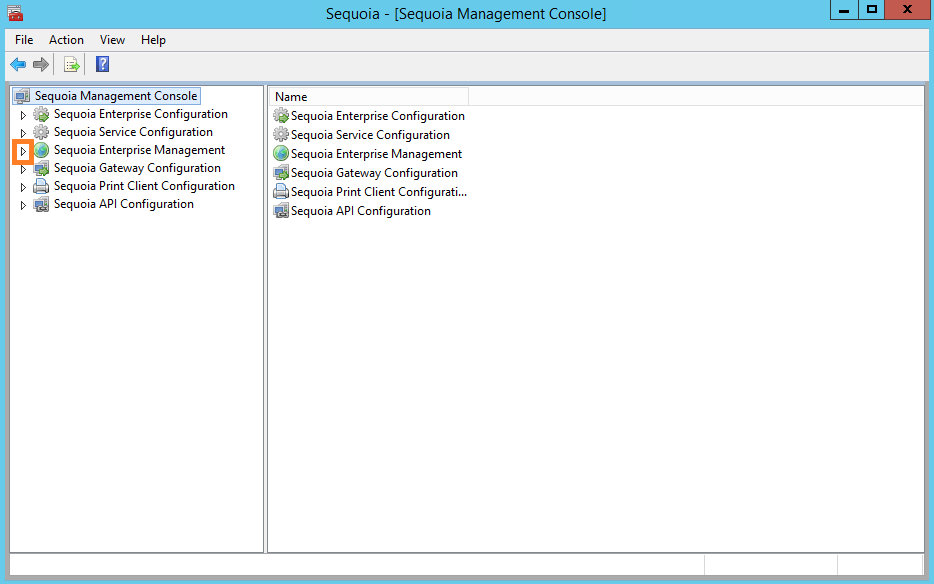
The Sequoia Management Console will appear. Click on the small arrow next to Sequoia Enterprise Management on the left hand side of the screen.
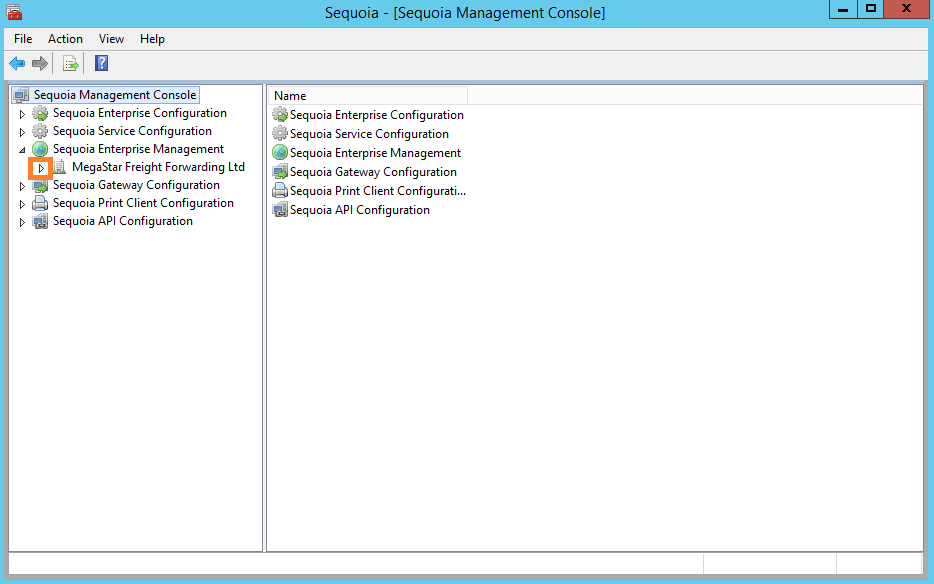
Click on the small arrow next to the company name to expand the menu (in the example below, the company name is MegaStar Freight Forwarding Ltd).
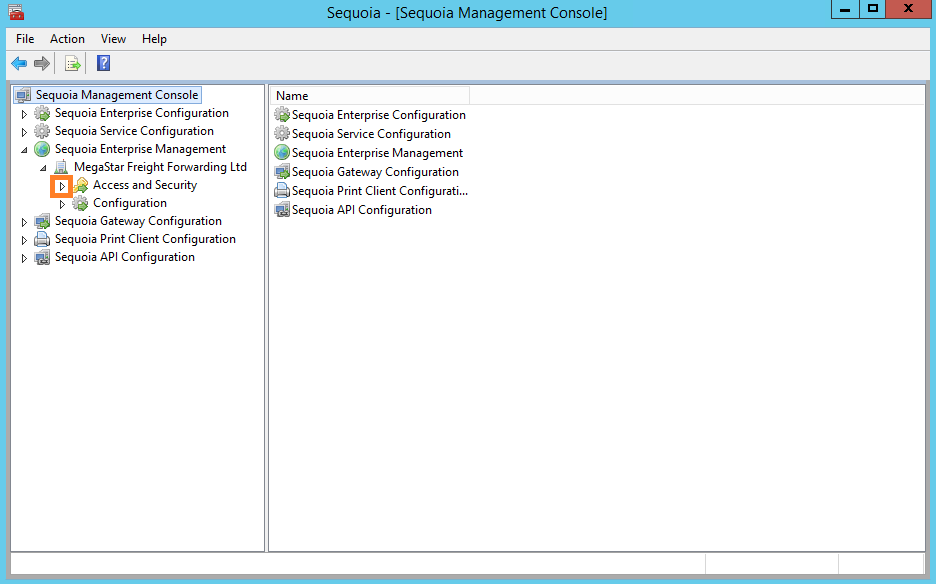
Click on the small arrow next to Access and Security to expand the menu.
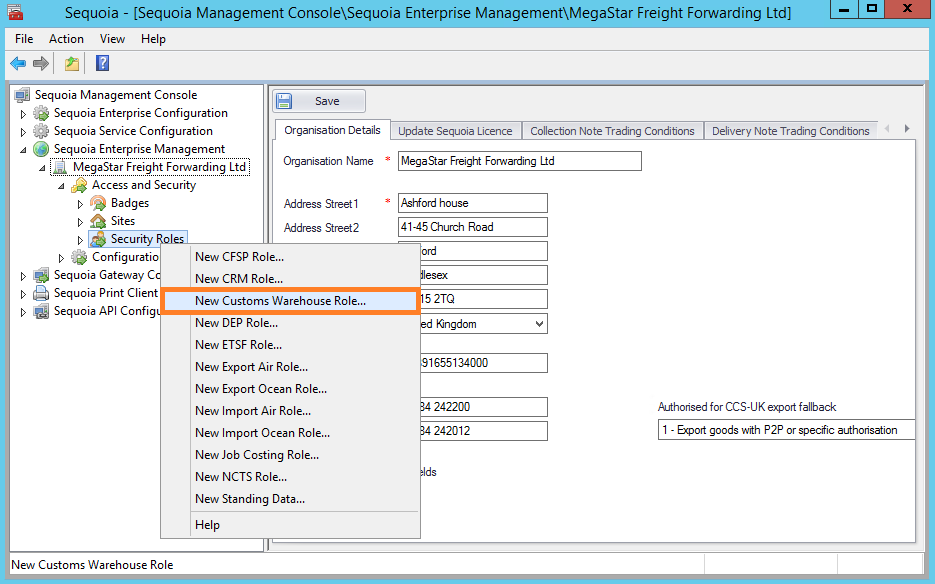
Right click on Security Roles and select New Customs Warehouse Role from the drop down menu.
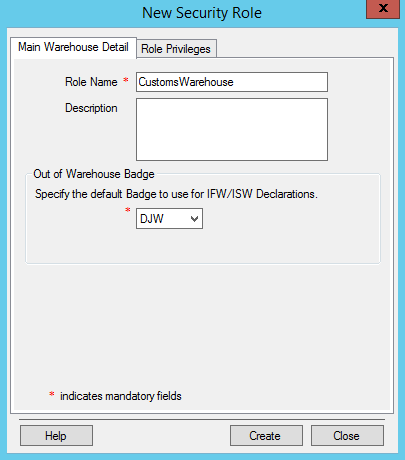
A New Security Role editor will appear.
Click on the Main Warehouse Detail tab.
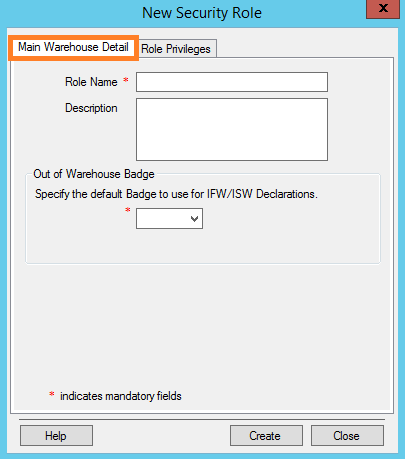
Next, enter the information described in the table below into the boxes of the New Security Role editor.
| Box | Information |
|---|---|
| Role Name | Enter a descriptive role name |
| Description | Optionally add a description defining what the role is for |
| Specify the default Badge to use for IFW/ISW Declarations | Click on the down arrow to the right of the box and select the default badge to use for out of warehouse declarations. Only badges already saved in Sequoia can be selected |
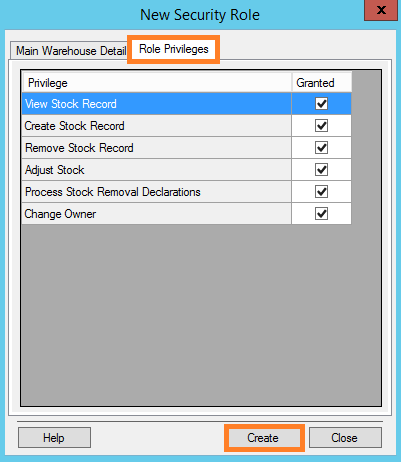
Click on the Role Privileges tab. Here you can set 'Role Privileges' for users who will be assigned this role. Tick the boxes next to the privileges that you wish to grant this role. If you want to withold certain privileges from this role, untick the boxes next to them. Next, click on the Create button to add the role to Sequoia. Click on the Close button to close the editor.
The role will then appear in the Security Roles list.
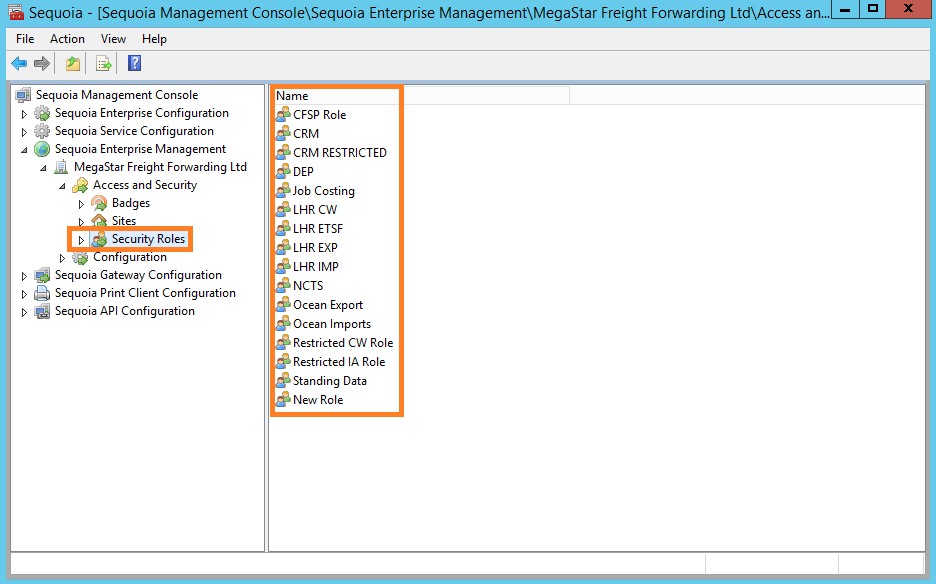
You can create multiple security roles by repeating the steps above. For example, you may want a role which allows all privileges and one which restricts certain privileges. A user cannot be a member of more than one type of role.
Adding Users to the Security Role
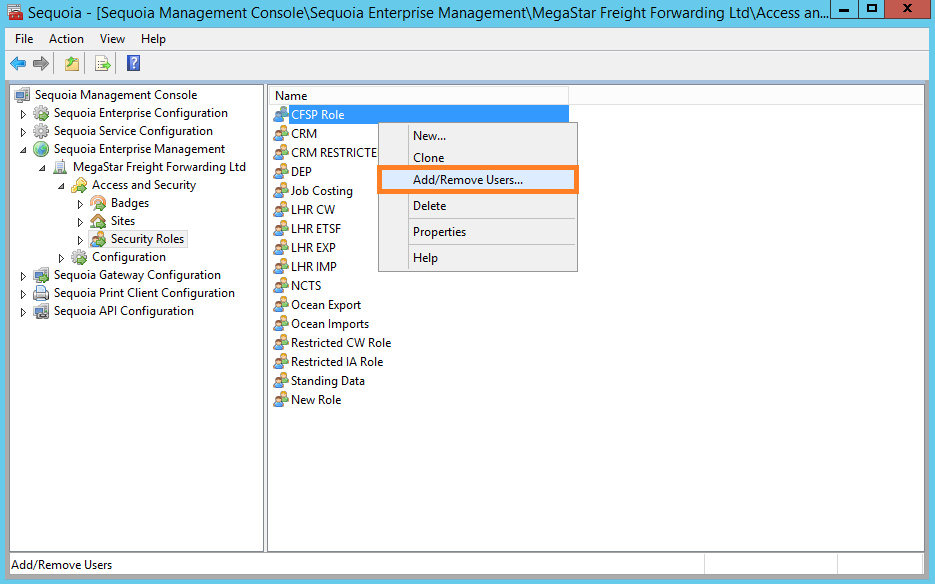
To add users to security role, right click on the new role that you created (in the example below this is CFSP Role). Click on Add/Remove Users from the drop down menu.
An Add/Remove Users from Security Role editor will appear.
To add a user to a security role, click on and highlight the name of the user from the available users list and click on the Add button.
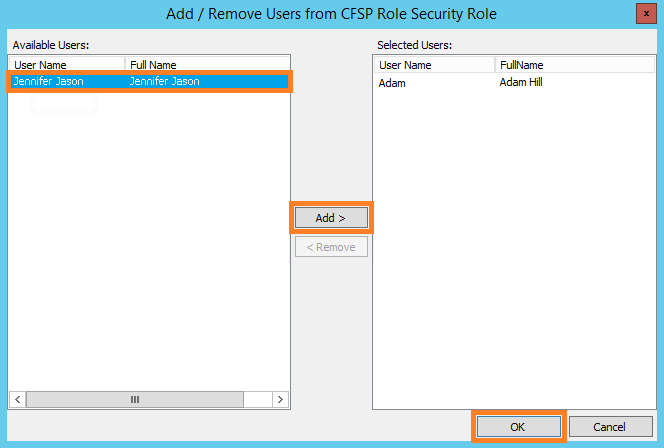
To remove a user from a security role, click on and highlight the name of the user from the selected users list and click on the Remove button.
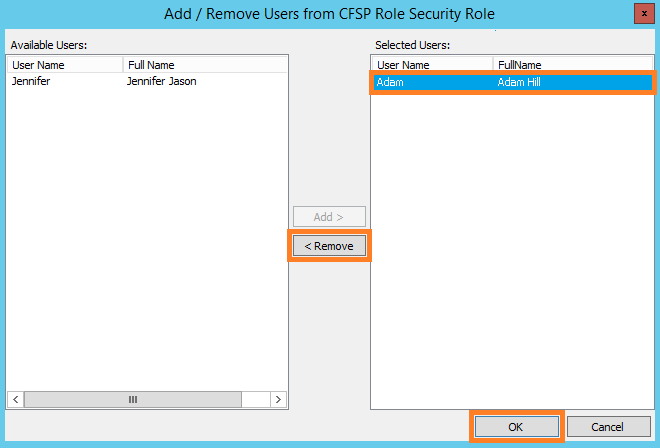
Next, click on the OK button.
