Getting started with Sequoia
This part of the resource will guide you through the layout of Sequoia and show you the application works in general. It gives you useful tips and tricks to maximise how you work and get the most out of the application, whatever you are doing and whichever module you are working in.
When you first load Sequoia, you will see the 'Start' page.
The modules that you are licensed to use are listed (as shown below).
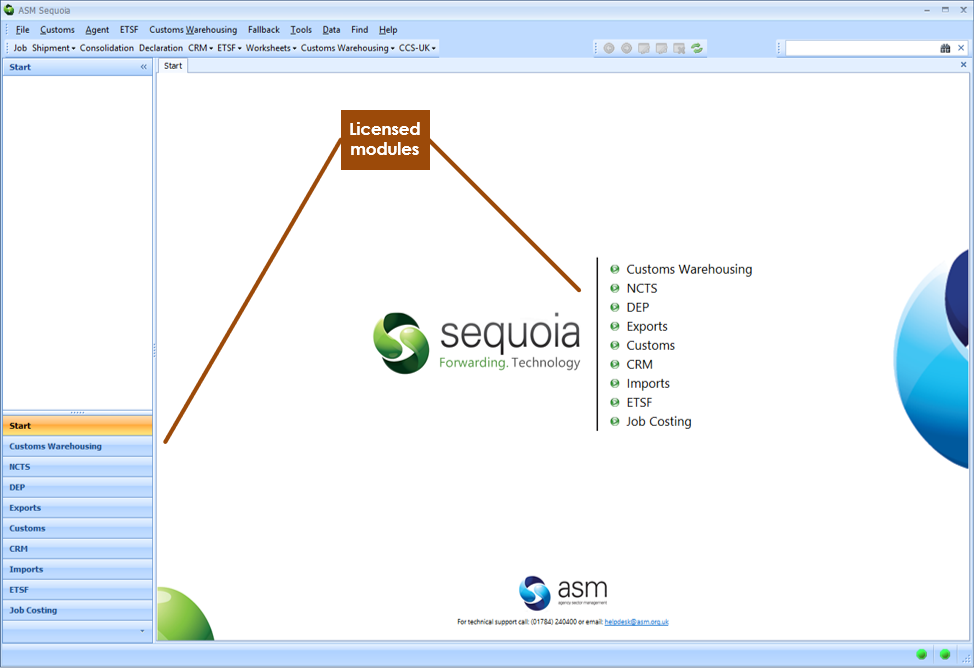
To start working or exploring, click on one of the modules - either bottom left or in the middle of the screen (as indicated above).
No matter what you're looking at or working on in Sequoia, the layout is consistent and the various parts work in the same way.
Once you have selected one of the modules, the illustration below (for the ETSF module in this example) shows the general layout. The labels show the various parts of the layout and each is described in detail below.
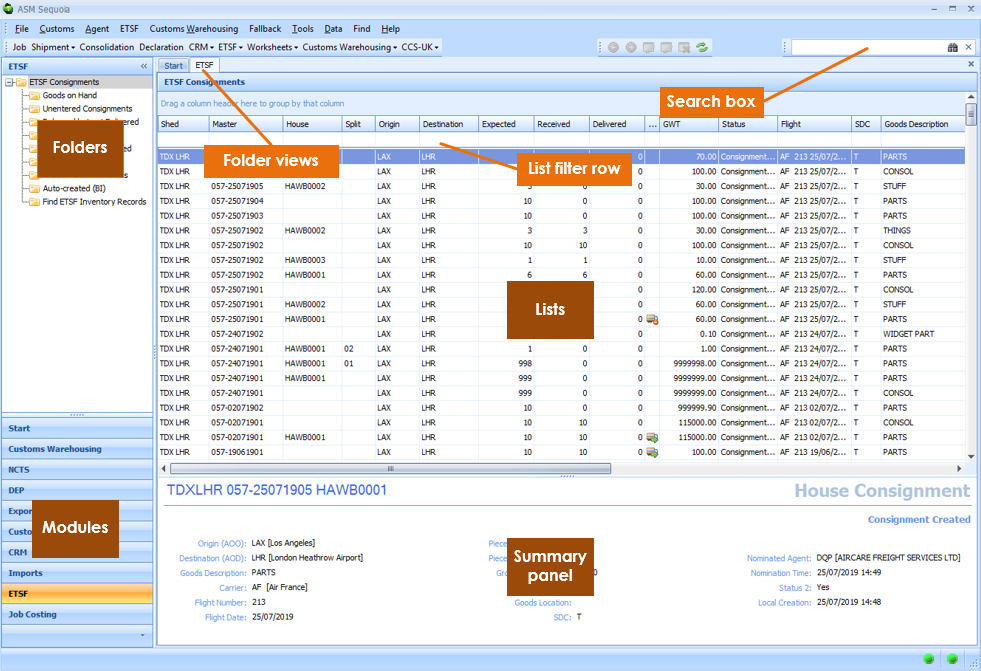
Modules
Each Sequoia module is a set of functionality (for example 'ETSF') that lets you view and manage your work (such as creating inventory records, arriving goods etc).
Each module has one or more associated lists of records. These lists are organised into folders. Selecting a module will display those folders towards the top left of the screen.
Folders
Folders are a way of organising the records for the module you have selected. In most cases they are simply a sub-set of the total records.
In the ETSF module for instance, there is a folder named 'Unentered Consignments'. This folder will only display inventory records for which no customs declaration has been made.
The main 'ETSF Consignments' folder however, will display all inventory records.
Selecting one of the folders will open a folder view, displaying a list of records appropriate to the folder.
Folder views
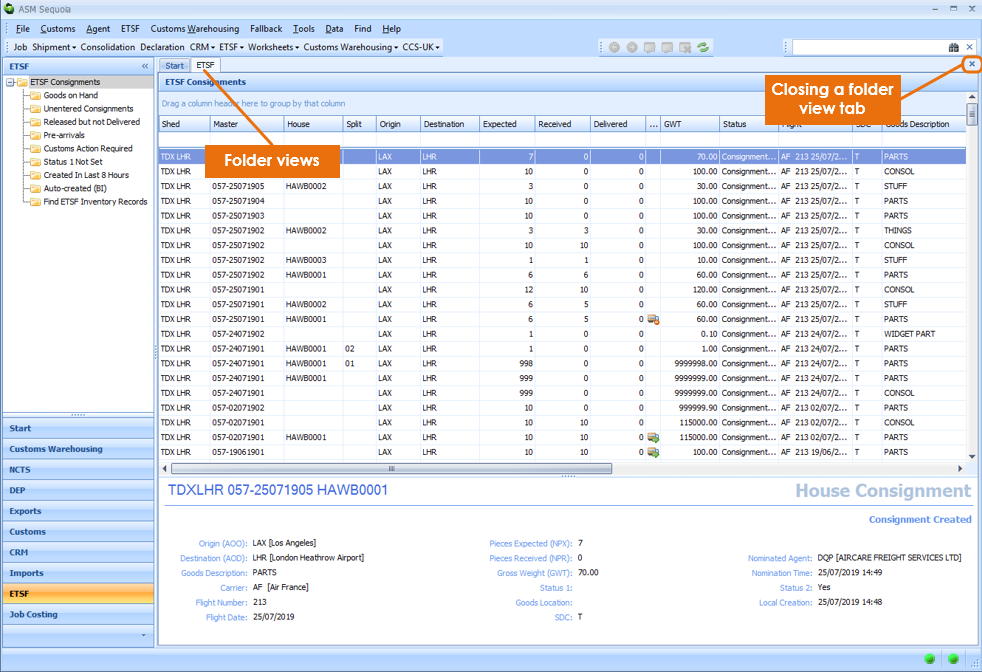
Each time you select a folder, a 'tab' will be added (as shown in the illustration below - folder views). You can open more than one folder at a time from one or multiple modules.
You can close any unwanted tabs by clicking x at the far right of the tab row on your screen (as illustrated below).
Lists
Selecting a folder will display a list of appropriate records (as shown in the illustration above). This is the same for every module and every folder (with the exception of 'Find' folders, but more on those later).
Selecting a record (a row on the list) will display a summary panel - beneath the list - giving significant information about that particular record.
All of these lists in Sequoia work in exactly the same way. You can order them, filter them, customise them and even export the data to a spreadsheet or other formats. All of this is described below.
Ordering lists
A list has records shown in rows, with each record on a separate row. Individual bits of data (such as the air waybill number) are arranged in columns.
Clicking on a column header (as shown below) will order the list in (ascending) order. Clicking the same column header again will change it to descending order.

A ![]() icon will appear on the column header to indicate that the list is ordered.
icon will appear on the column header to indicate that the list is ordered.
To clear the order, right-click the column heading and select Clear Sorting from the menu.
Filtering lists
There are a number of ways you can filter the data displayed on a list.
The simplest way is to use the list filter row – the blank row directly below the column headings. Typing into one of the columns in this row will filter the list accordingly (as shown below).
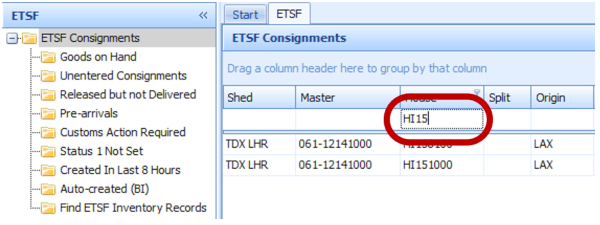
You can type into more than one column and the resulting filter will take everything you have typed into account.
Other ways to filter
If you hover the mouse cursor over a column heading a filter icon (like a funnel) will appear on the right of the column heading. If you click on that icon it will display a list of values that appear in that column with other options – in the same way as a Microsoft Excel spreadsheet works.
If you want to find all instances of a particular value or text that could appear in more than one column on the list, right click any column heading and select Show Find Panel from the menu.
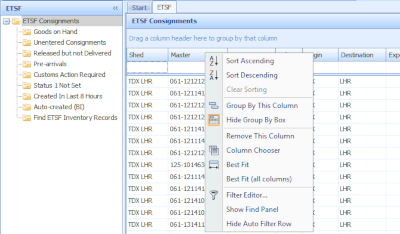
This will display the Find Panel above the column headings (as illustrated below).

Enter the value or text you are looking for and click [Find]. All instances of the characters you entered will be highlighted in yellow on the list. Click [Clear] to remove the highlighted text and click the ‘X’ to the left of the panel to remove it.
You can build more complex filters (such as ‘Master begins with ‘125’ and Origin equals ‘LAX’) by right clicking any column heading and selecting Filter Editor from the menu. This displays the Filter Editor dialog (see below).
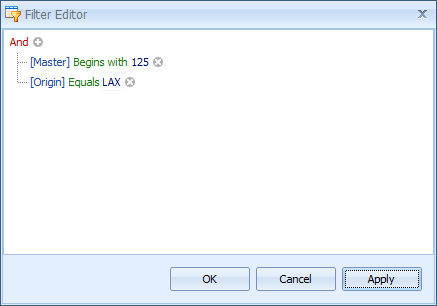
In the above example, you could just type '125' in the 'master' column and 'LAX' in the 'Origin' column to get the same result.
You build up the filter you want. You can add clauses by clicking theicon.
In the example above, you can
- click on [Origin] to select the column you wish to apply the clause to,
- click on Equals to choose how to filter (e.g. 'begins with') and
- click on LAX to set the value to compare.
Click [Apply] or [OK] to see the results.
Details of any filters that have been applied to the list will be displayed at the bottom of the list (see below).

You can switch between filters you have used by clicking on the dropdown ![]() icon to the right of the filter details (as shown above).
icon to the right of the filter details (as shown above).
To select one of the filters on this dropdown, click on it. To clear one of the filters, hover the mouse over it on the dropdown and click the red X that appears to the right of it.
To clear all filters, click the ‘X’ to the left of the details (as shown above).
Customising lists
You can customise how the lists look, the order in which the columns appear and indeed which columns are displayed.
Moving columns
You can change the order in which the columns on a list are displayed by clicking and holding a column heading and then dragging it left or right, dropping it where you want it moved to.
Removing columns
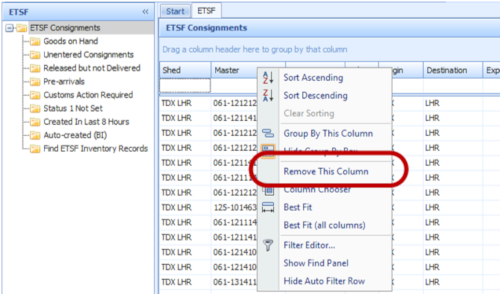
To remove a column from the list, right click the column heading and select Remove This Column from the menu.
Adding columns
Not all available columns on all lists are displayed by default.
To add a column that is not currently visible, right click any column heading and select Column Chooser from the menu. This will display the Customisation dialog (as shown below).
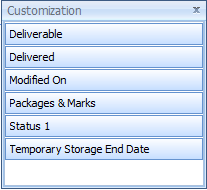
Any columns that are not already visible on the list will be displayed in this dialog.
Double click the column you want to display or click and hold to drag it to where you want it to appear.
Exporting lists
You can export the data from any list in Sequoia.
To do this, right click on any row of data on the list (not the column header) and select Export To from the menu. Then choose the format in which you want to export the data.
The data that will be exported is the data that is shown in the list – i.e. only the columns you can see on the list. Columns that have been removed will not be included.
All of the rows on the list will be exported, regardless of any filter you have applied.
Grouping records
Some lists in Sequoia have a row, directly above the column heading, to allow you to group records on the list.
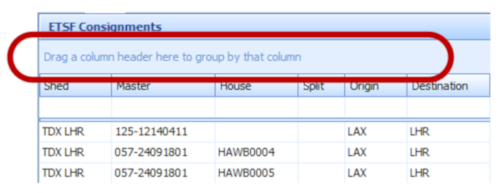
Clicking and dragging a column header onto this row will group the records on the list. The display will change (as shown below where the Master column has been dragged into the group by panel).
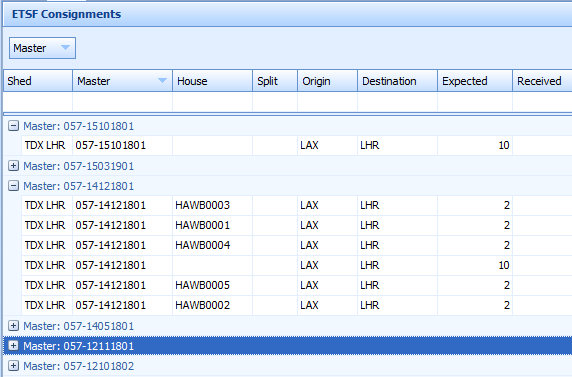
You can expand any of the resulting grouped records on the list by clicking the  icon to the left of any row. You can also right-click in the group by panel and select Full Expand from the menu to expand all rows.
To remove any grouping, either drag the column out of the group by panel or right-click in the group by panel and select Clear Grouping from the menu.
Summary panel
Selecting a record (row on the list) will display a summary panel - beneath the list - giving significant information about that record.
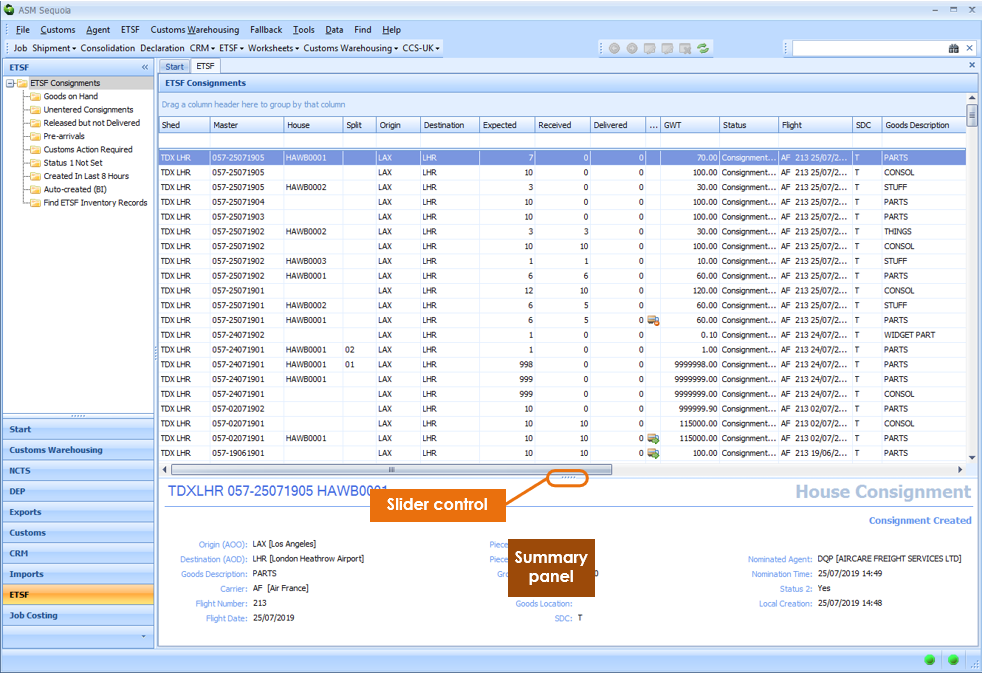
At the top of this summary panel there is a slider control - ..... - which allows you to adjust the height of the summary panel or to hide it completely. Simply click and drag the slider up or down to do this.
There is also a vertical slider control between the left section of the screen (with the modules and folders) and the right hand section (with the lists).
The 'Global' Search box
On the menu bar at the top of the Sequoia workspace there is a search box (as shown below).

You can enter any of the following into this box
- Job reference
- DUCR (Declaration UCR) of a customs declaration (CHIEF or CDS)
- Master air waybill number (e.g.
125-45061234) - CHIEF Entry number (e.g.
120-01057V) - don't include the date! - Trader reference (Box 07) of a customs declaration (CHIEF or CDS)
- NCTS MRN (Movement Reference Number)
- NCTS LRN (Local Reference Number)
- CDS declaration LRN (Local Reference Number)
- CDS declaration MRN (Movement Reference Number)
- Sales Invoice Number - this will open the job to which it relates
Only exact matches will be found. The search is not case sensitive.
AF3007001andaf3007001will return the same result.
Once you have entered the reference you are searching for, press Enter or click the  icon.
icon.
If a single record is found (such as a job) that matches your search, that record will be opened and displayed automatically.
If more than one record is found (for example a job and a declaration where the job reference was used as the trader reference) then a dialog will display, listing the matching records.
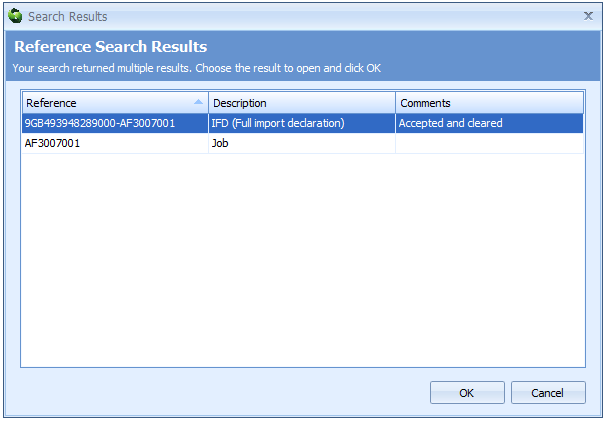
You can double-click the record you want to look at or highlight it and click [OK].
For most modules in Sequoia, there is also a 'find' folder where you can create simple or complex searches to find the information you want. See Searching and Reporting for more information.
